
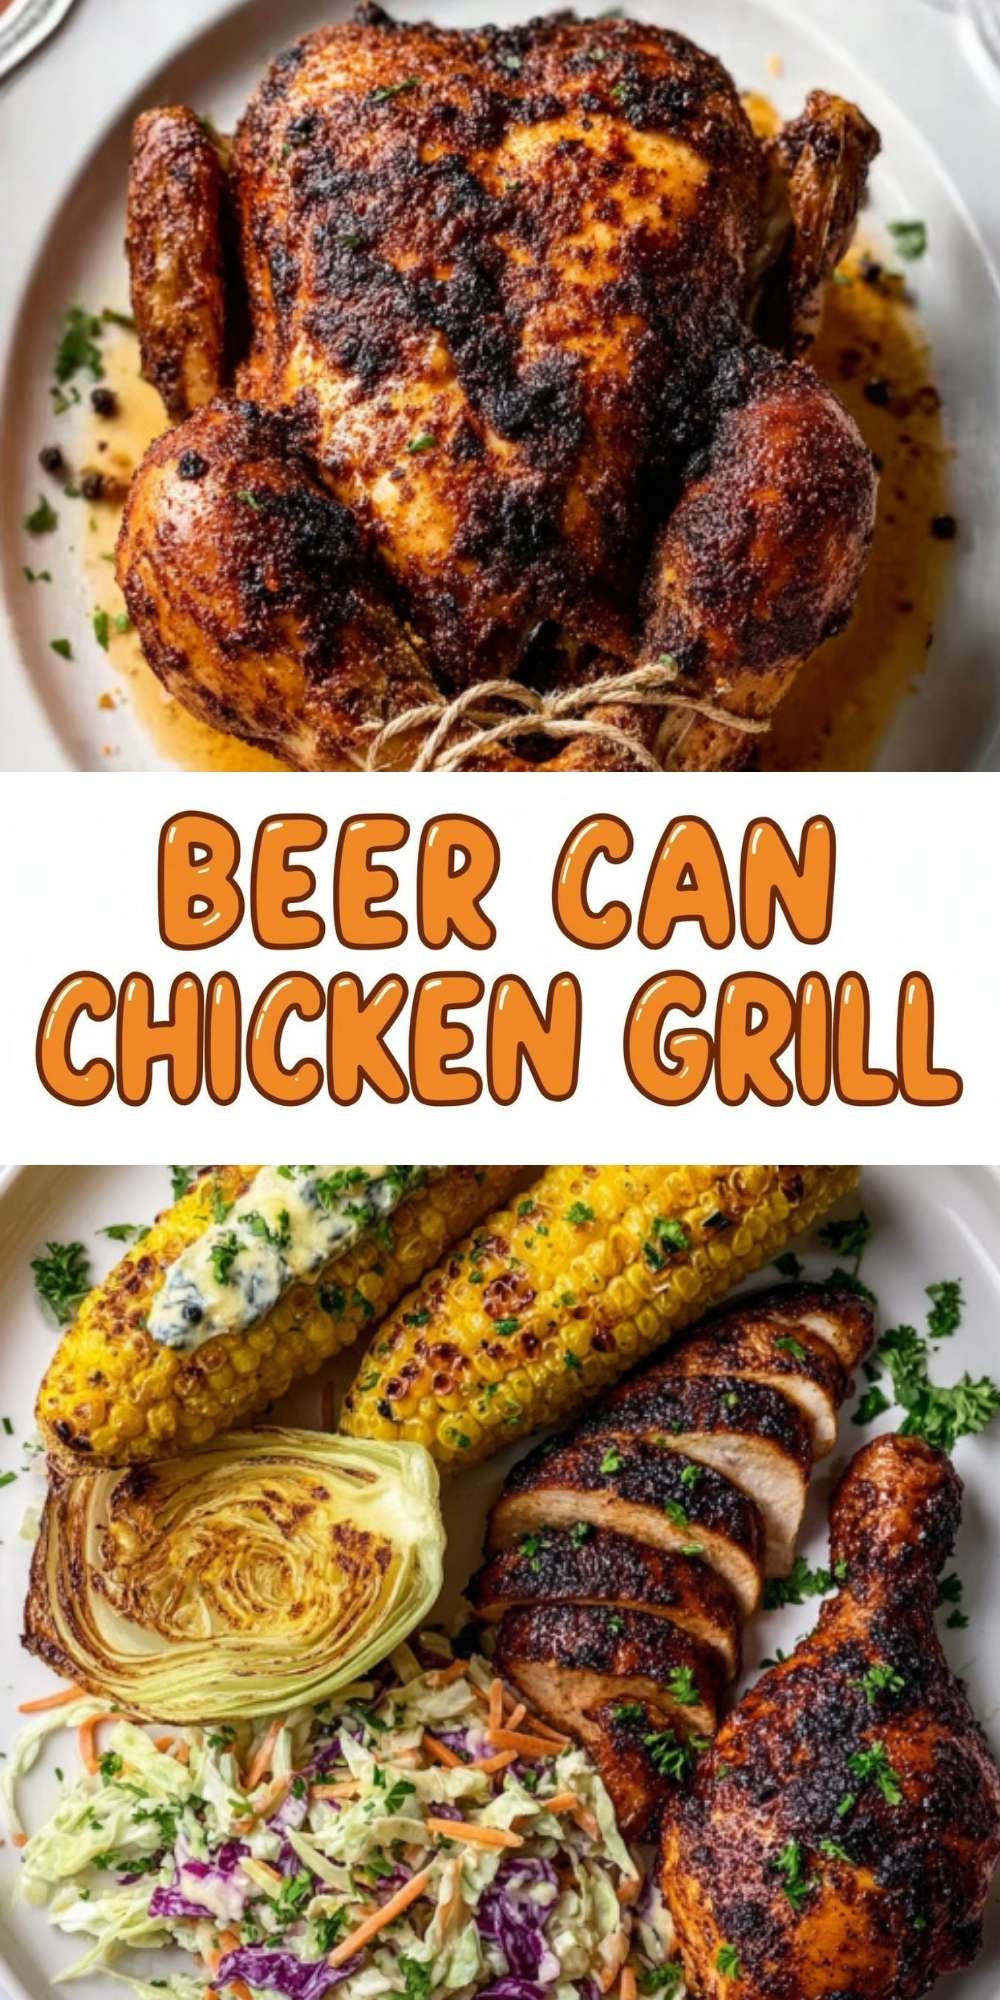
Hey, I’m Chloe! If you want a showstopping, low-effort main dish that looks impressive and feeds a crowd, this beer can chicken grill recipe is for you. It’s part kitchen trick, part comfort food, and totally reliable when you follow a few simple rules. You’ll get bronzed, crackly skin on the outside and tender, juicy meat inside. This post walks you through every detail so you can grill with confidence, get great photos for Pinterest, and enjoy the moment when everyone digs in.
Why beer can chicken grill works and why I love it
Cooking the bird upright creates a mini-roasting chamber around the cavity so hot air circulates evenly. The liquid in the can generates steam that helps keep the dark meat moist while the direct heat crisps the skin. On a grill you also get that extra roasted, slightly smoky flavor you cannot replicate in the oven. For backyard meals and gatherings, beer can chicken grill feels fun and celebratory while actually being easy to manage.
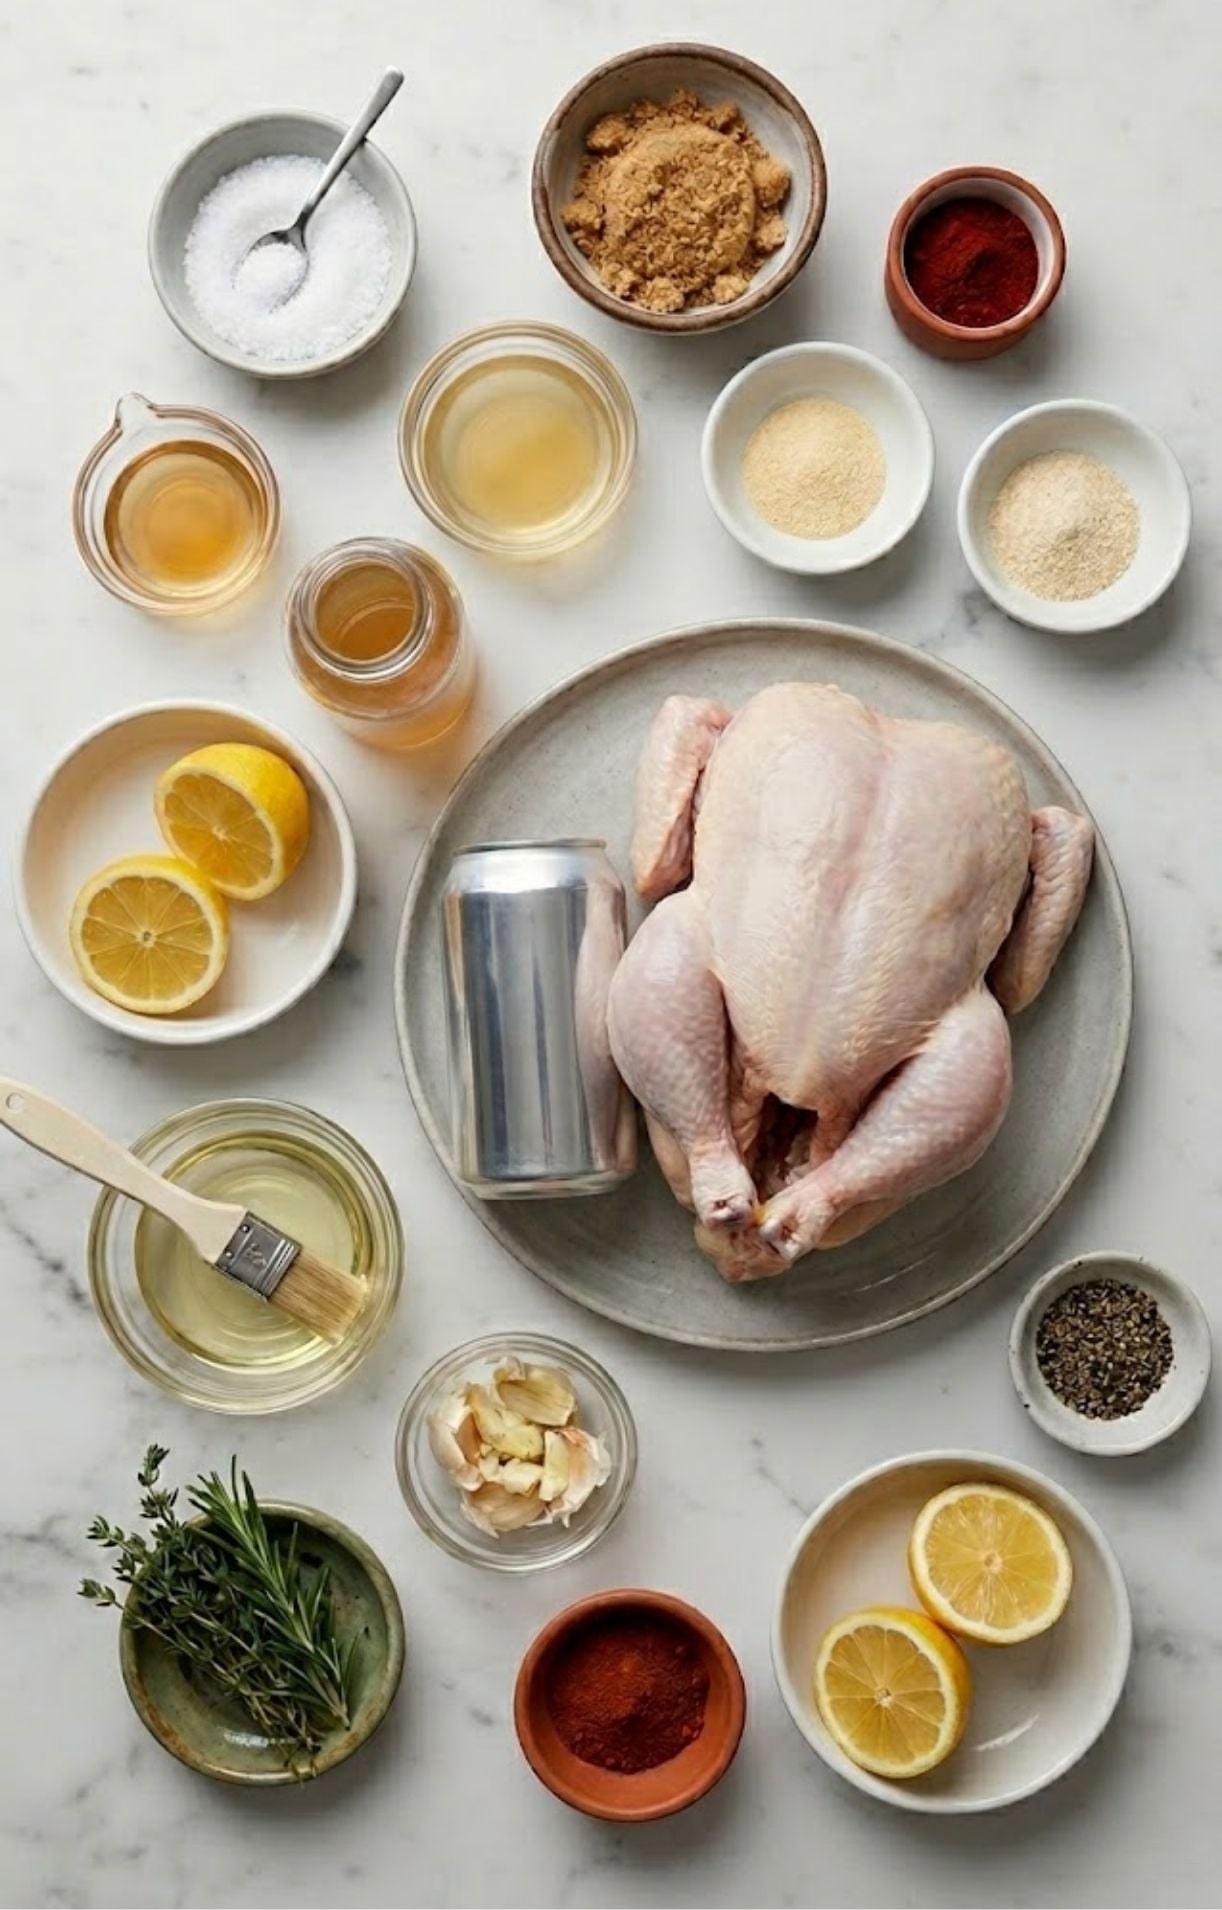
Ingredients
- Whole chicken, giblets removed
- Can of beer, partially emptied, or nonalcoholic beer, or chicken broth with apple cider vinegar
- Neutral oil such as canola or avocado oil
- Kosher salt
- Brown sugar
- Smoked paprika or regular paprika
- Garlic powder
- Onion powder
- Ground black pepper
- Chili powder or cayenne, optional
Optional aromatics to tuck in the cavity or drip pan:
- Lemon halves
- Smashed garlic cloves
- Fresh thyme or rosemary sprigs
For precise amounts, check the recipe card at the end of the post.
Equipment checklist
- A gas or charcoal grill with a lid
- A roasting stand or tall, narrow beer can and a rimmed baking sheet or disposable roasting pan to carry the bird to the grill
- Instant-read thermometer — non negotiable for safe, perfect results
- Tongs and heatproof gloves for handling the hot bird
- Poultry trussing twine, optional, to stabilize the legs
How to grill Beer Can Chicken
This is a beginner-friendly, grill-first set of steps that focuses on safety, steady heat, and a short hands-on prep window. Follow the steps below and trust the thermometer. The grill does the heavy lifting.
Instructions
- Preheat the grill. Light the grill and preheat with the lid closed. For gas, light all burners and aim for a grill temperature of 350°F to 375°F before you place the bird. For charcoal, bank coals to one side and set the bird on the cooler side for indirect heat.
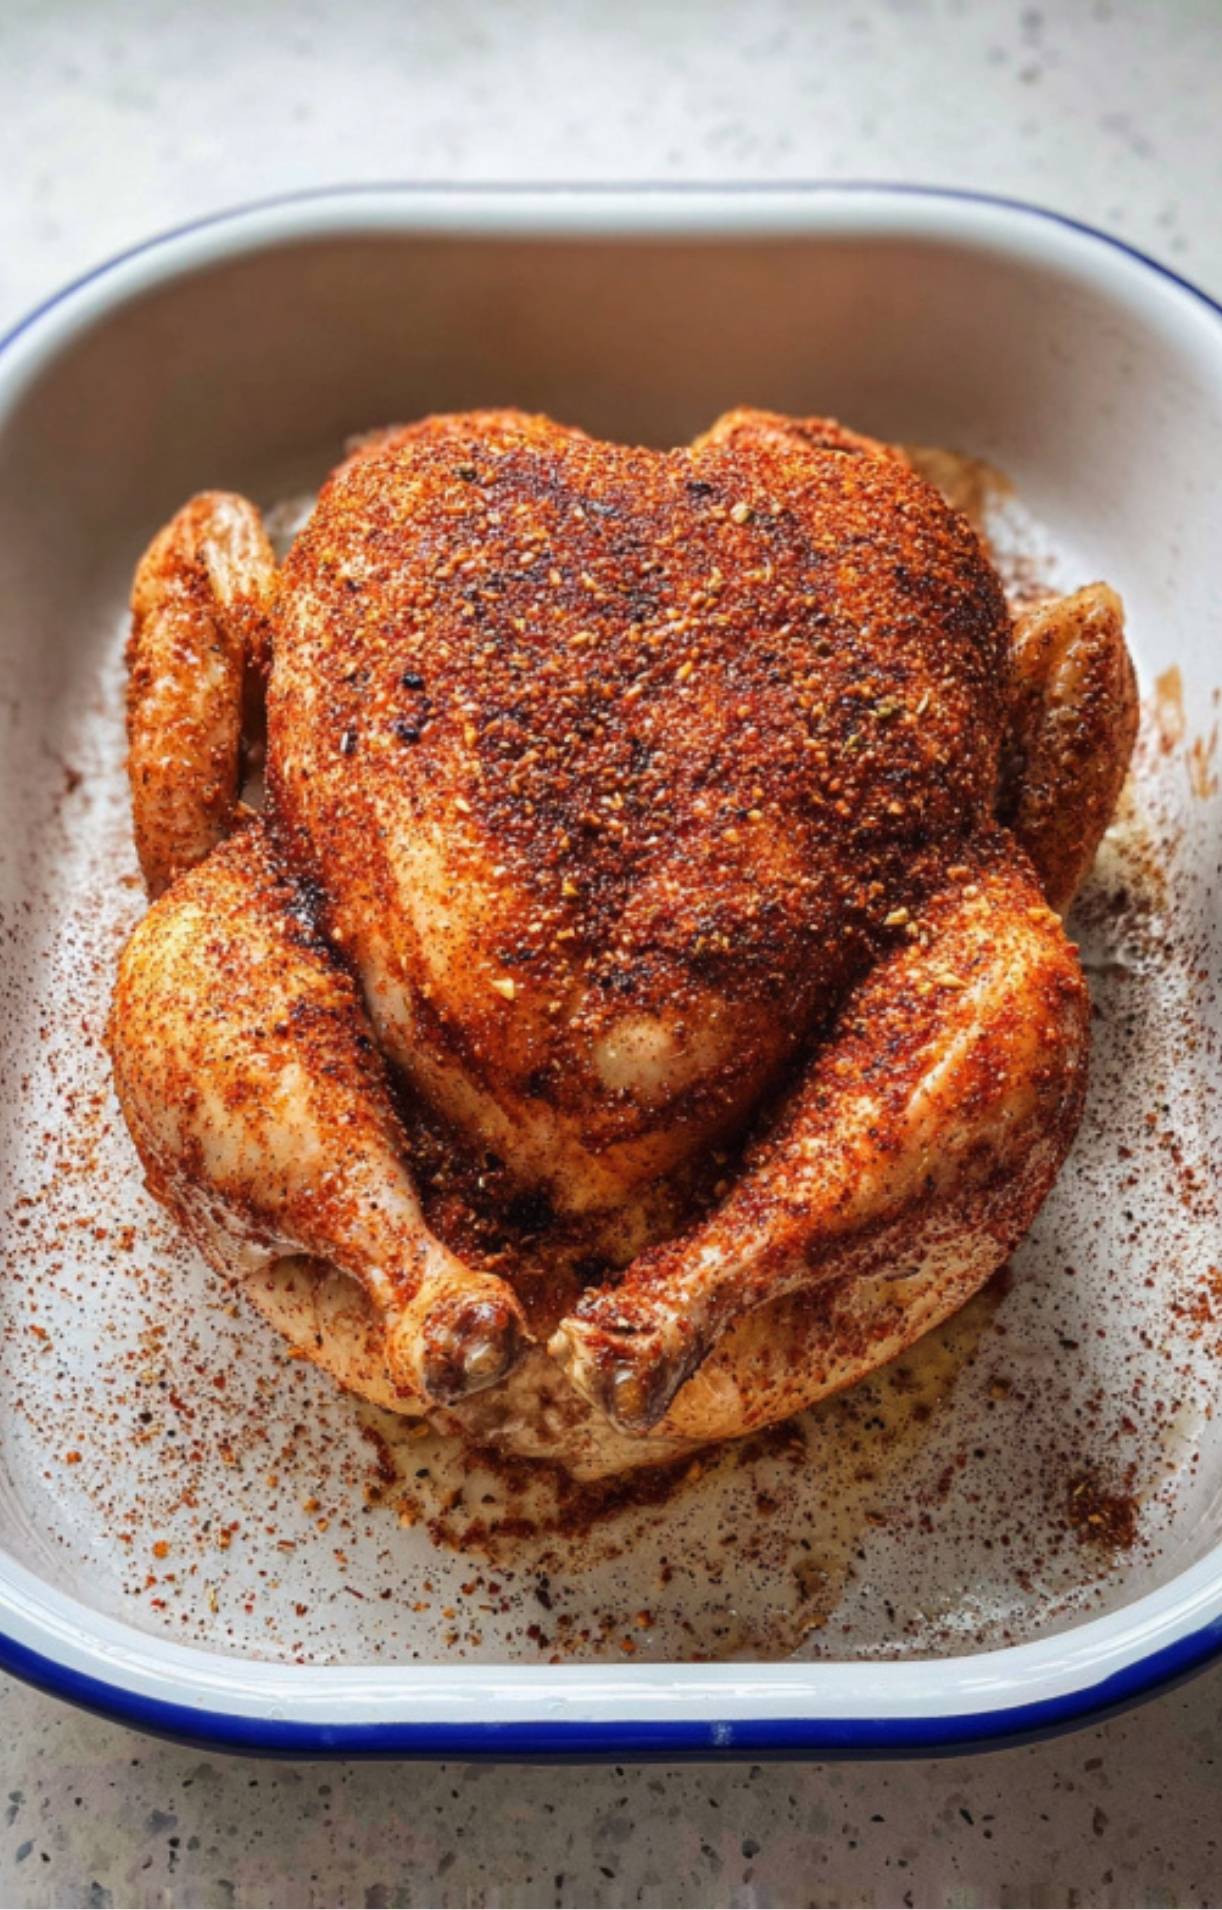
- Mix the rub. In a small bowl whisk together the brown sugar, kosher salt, smoked paprika, garlic powder, onion powder, black pepper, and chili powder if using.
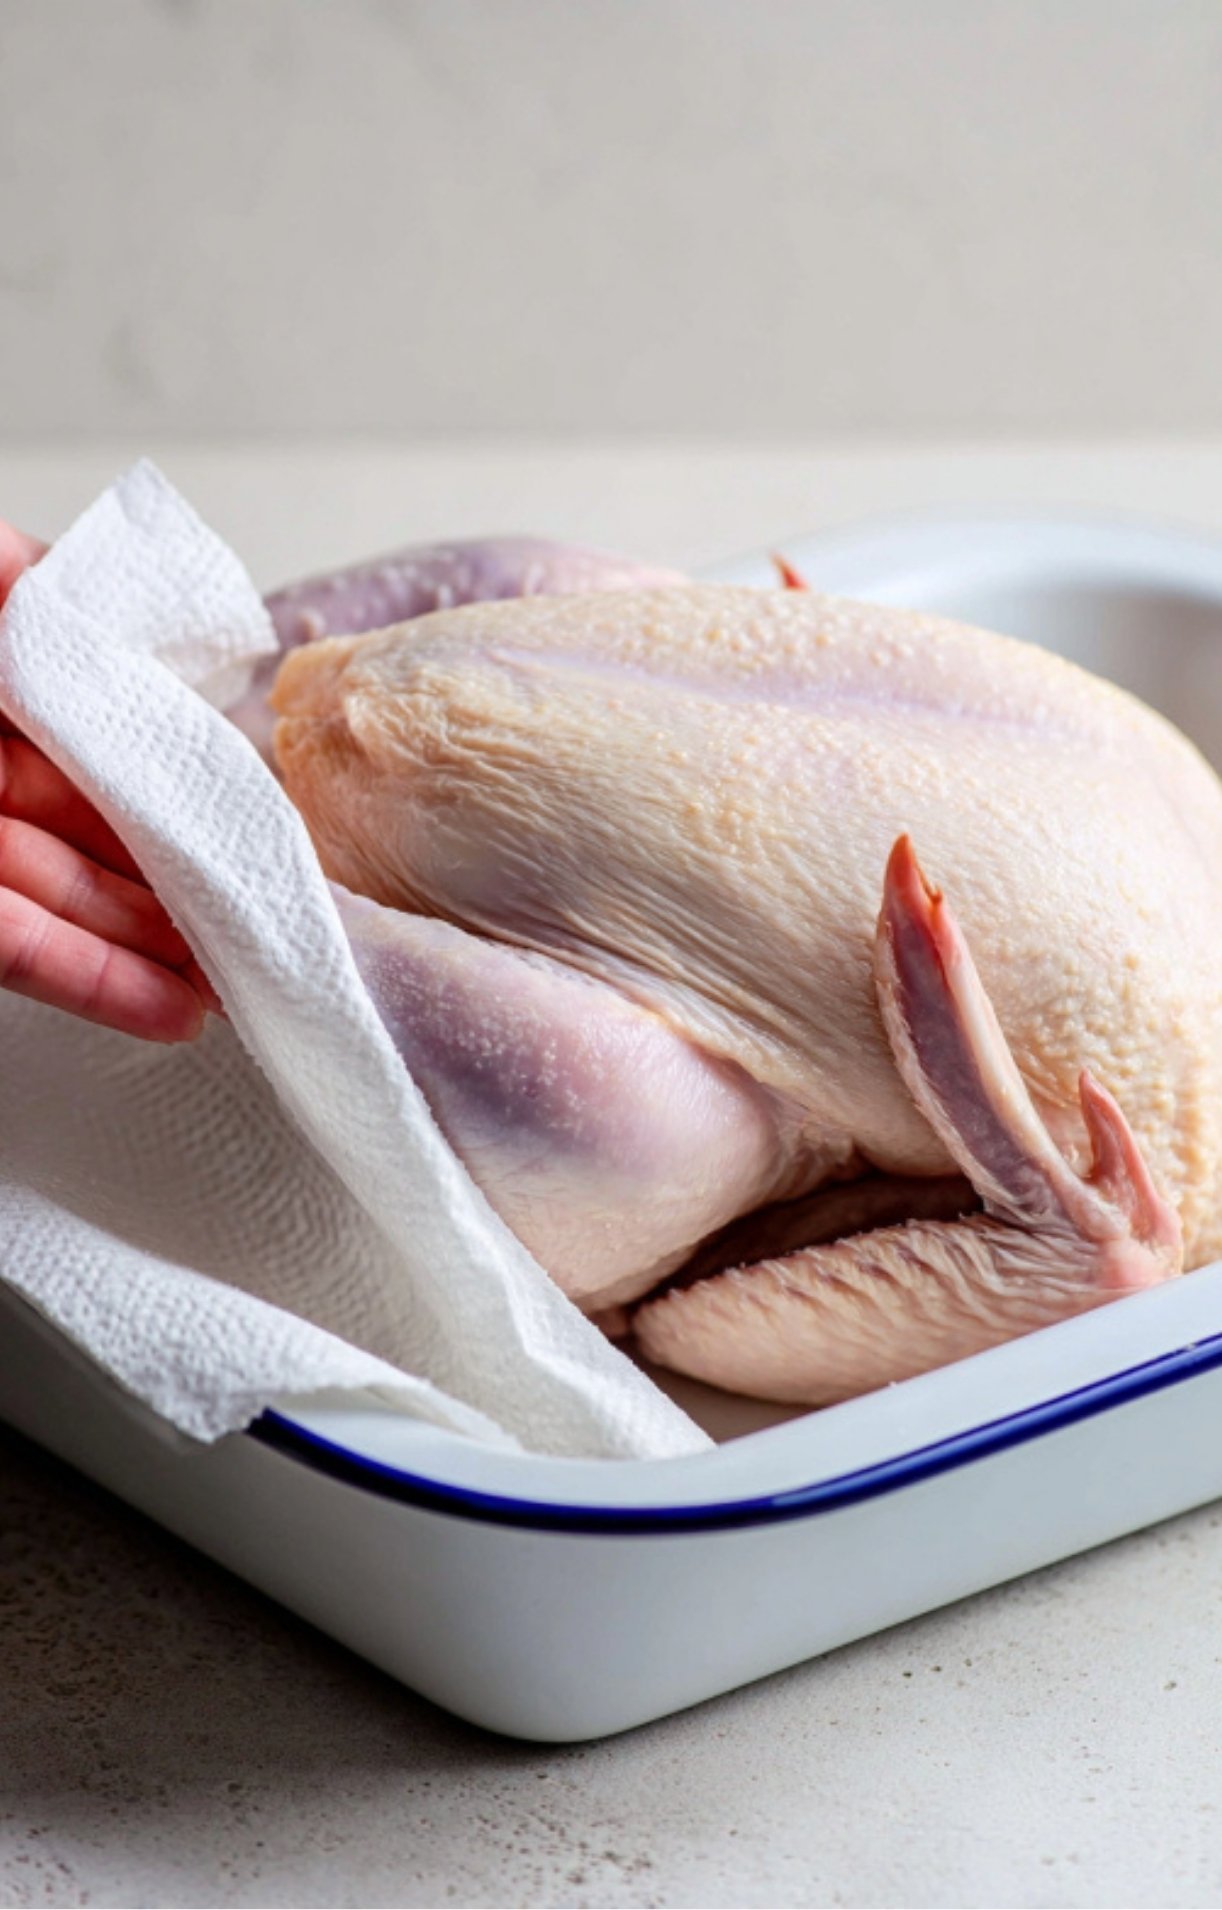
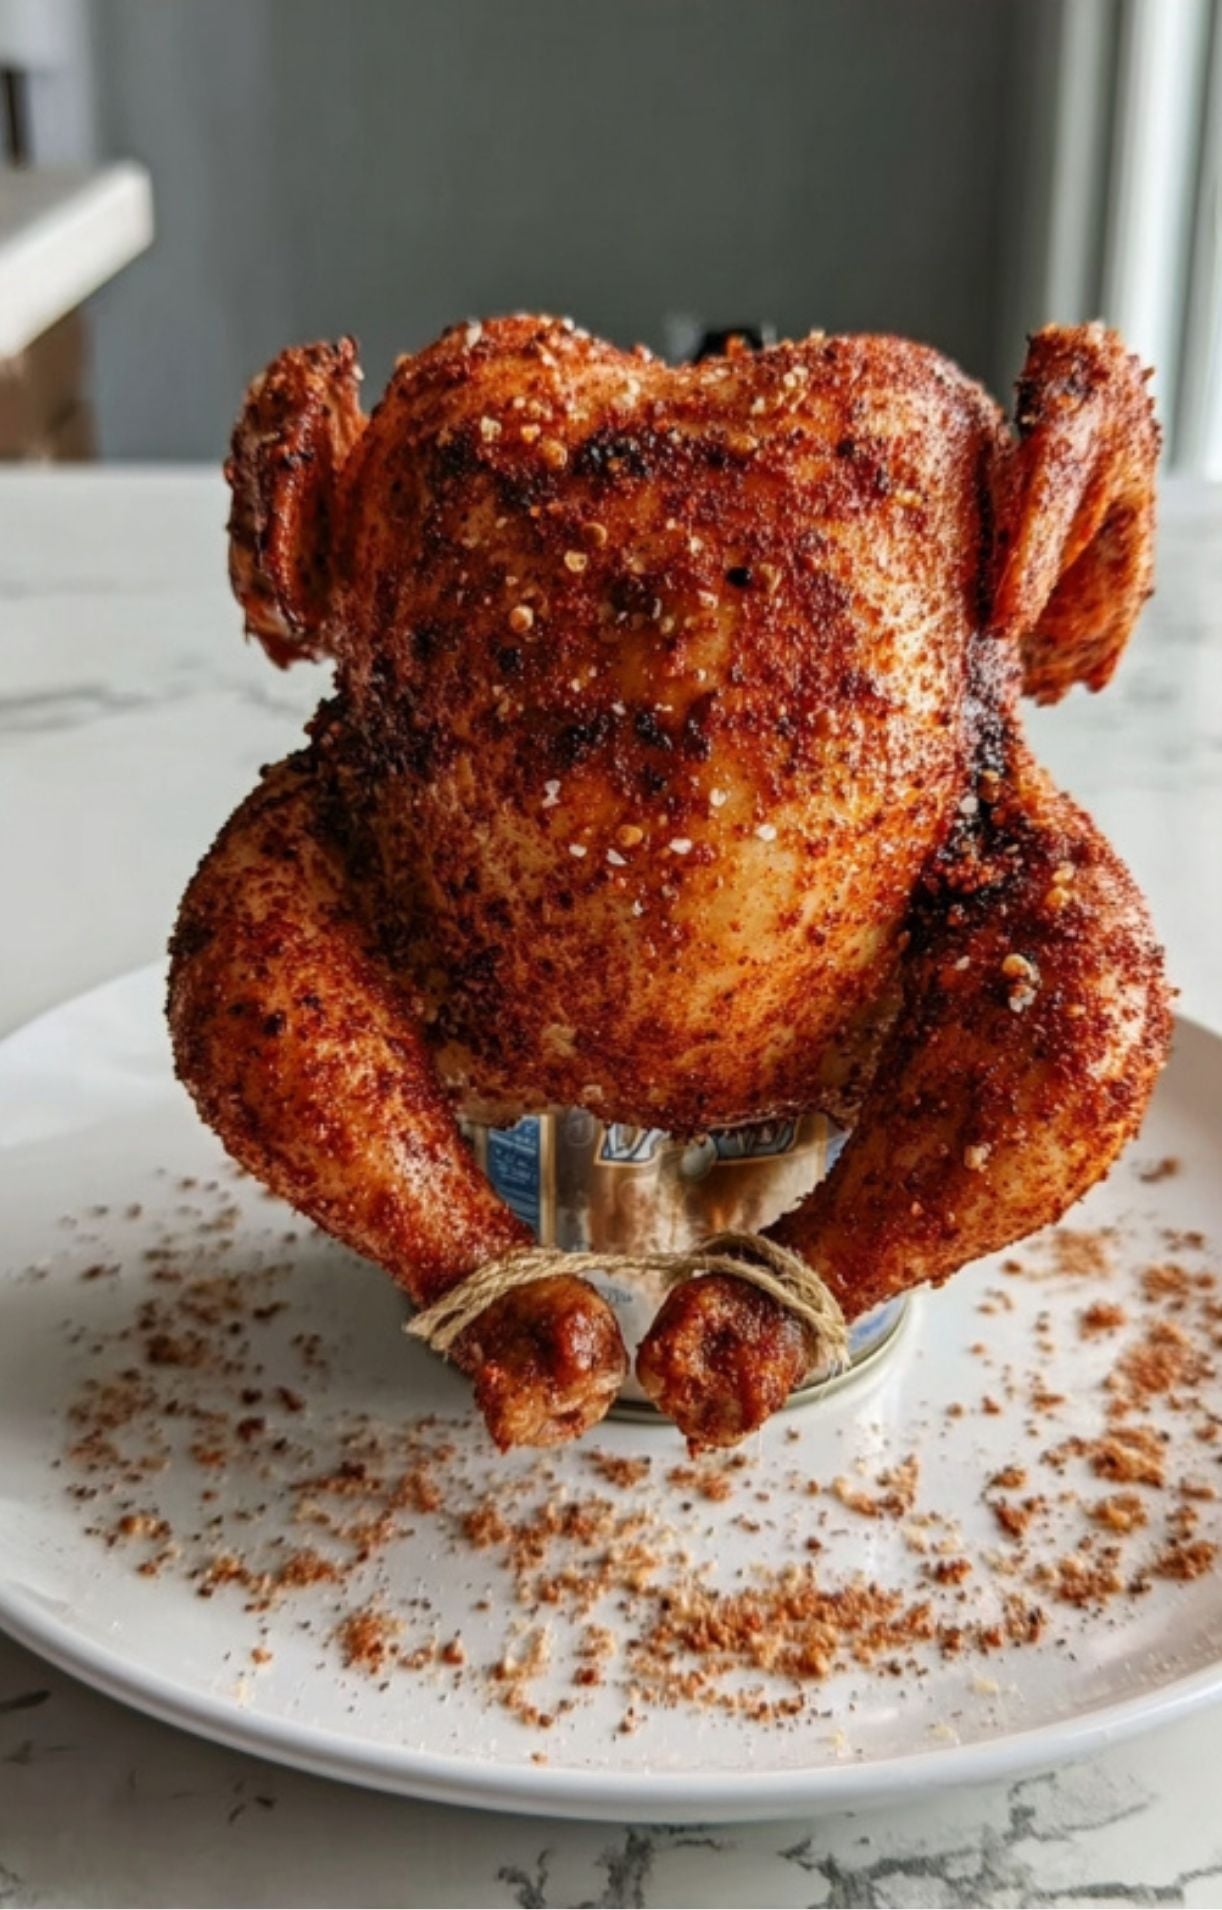
- Season the chicken. Pat the chicken dry. Rub it all over with the neutral oil. Gently loosen the skin and rub some seasoning under it over the breasts and thighs. Rub the rest over the outside and inside the cavity. Tie the legs together with kitchen twine if you like for stability. Tuck the wing tips under the bird.
- repare the can and mount bird. Open the beer and pour out or sip about half. If you are using a broth or nonalcoholic beer substitute, pour that into the can. Set the can in a shallow rimmed pan to catch drips. Carefully slide the chicken cavity down over the can so the bird stands upright. If it wobbles, use a vertical roaster.
- Grill indirect. Turn off the burner directly under where the chicken will sit if using gas, or move the bird to the unlit side on a charcoal grill. Maintain grill heat around 325°F to 350°F. Close the lid and cook for about 1 hour to 1 hour and 20 minutes for a 4 to 5 pound bird. Don’t keep opening the lid.
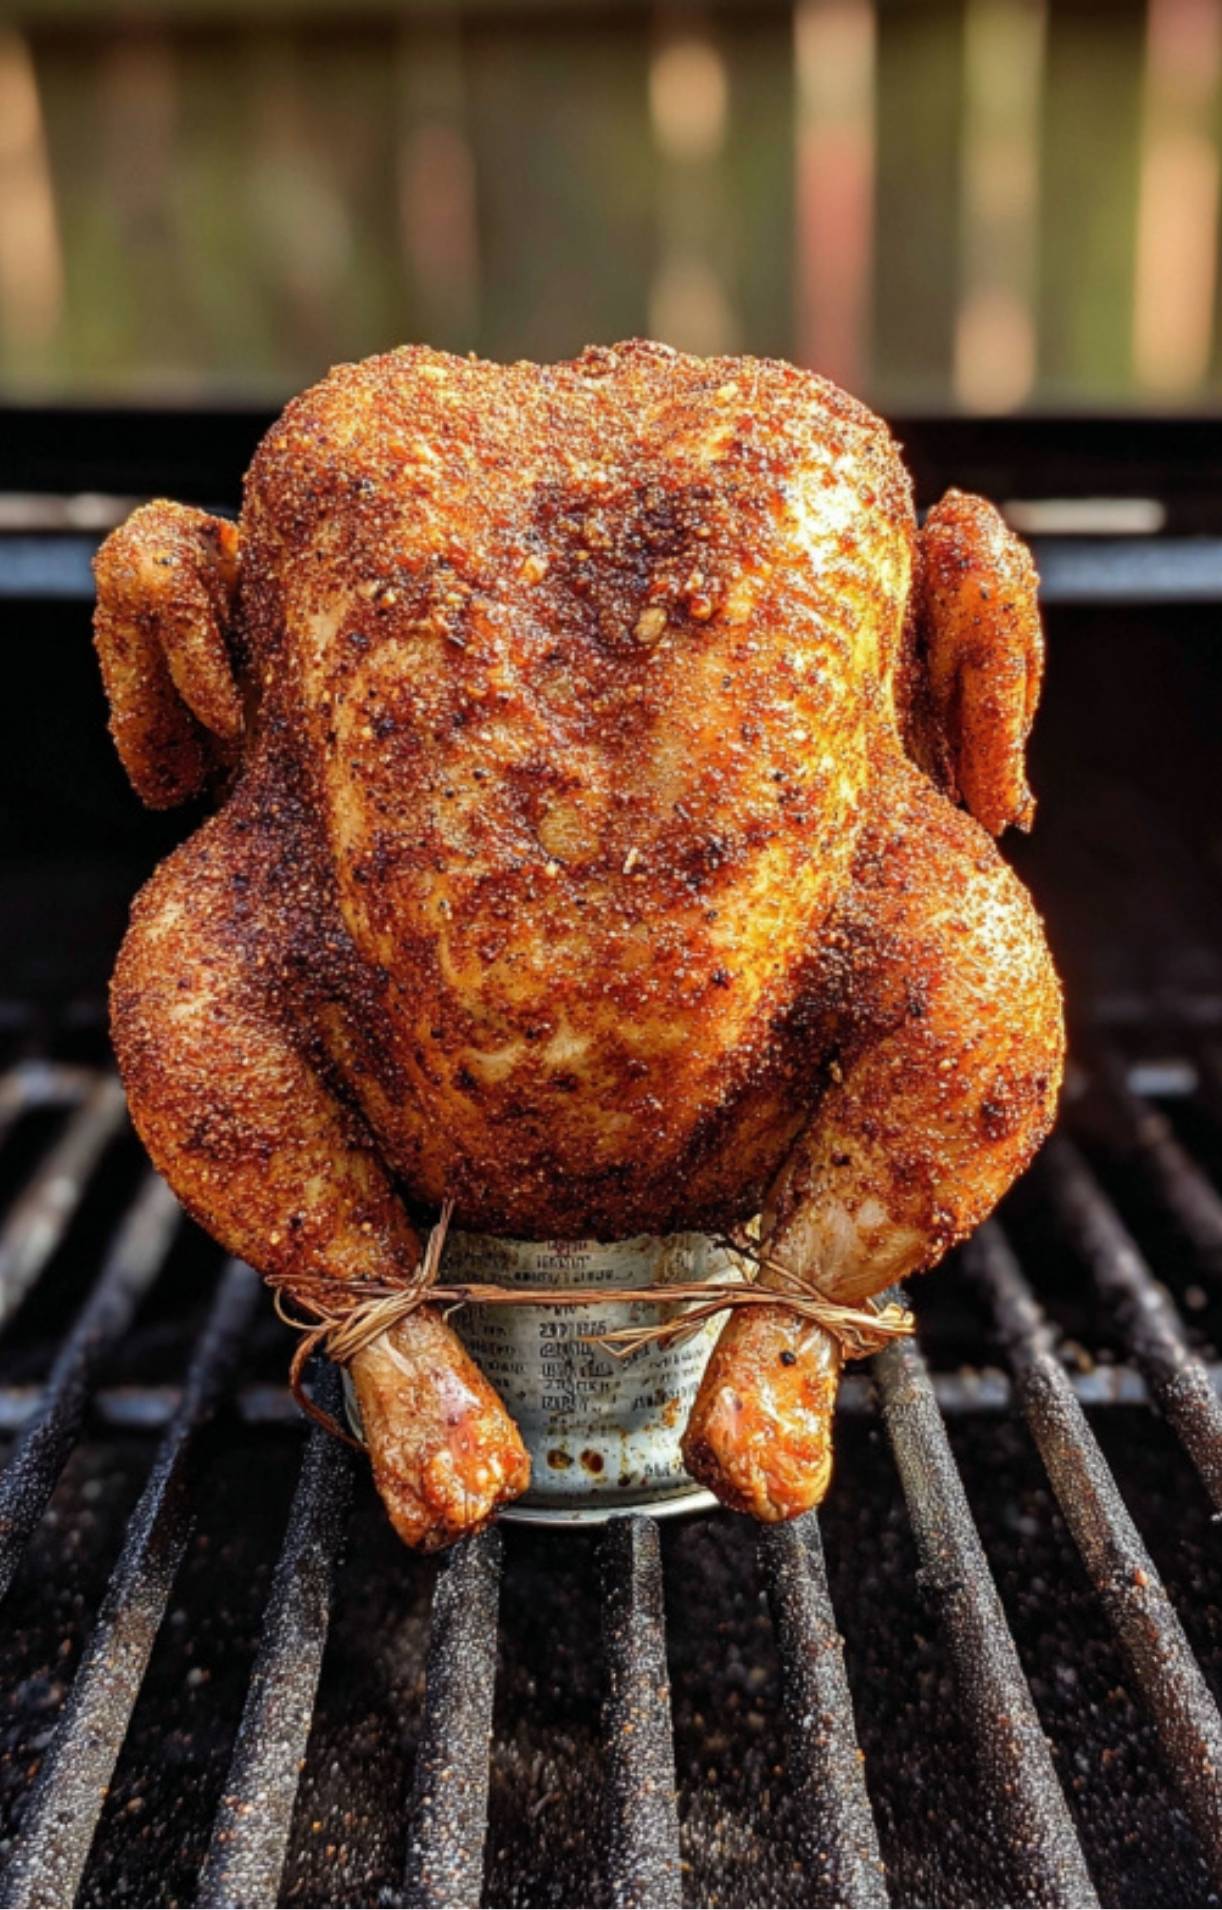
- Check temperature. Insert an instant-read thermometer into the thickest part of a thigh, avoiding bone. You want 165°F in the breast and around 175°F in the thigh for tender dark meat. If the breast reaches 165°F and the thigh is not yet to 175°F, tent the breast with foil and let the thigh finish.
- Crisp the skin. If you want extra crackle, increase grill heat or move the chicken over to direct heat for the final 5 to 10 minutes while watching carefully for flare-ups.
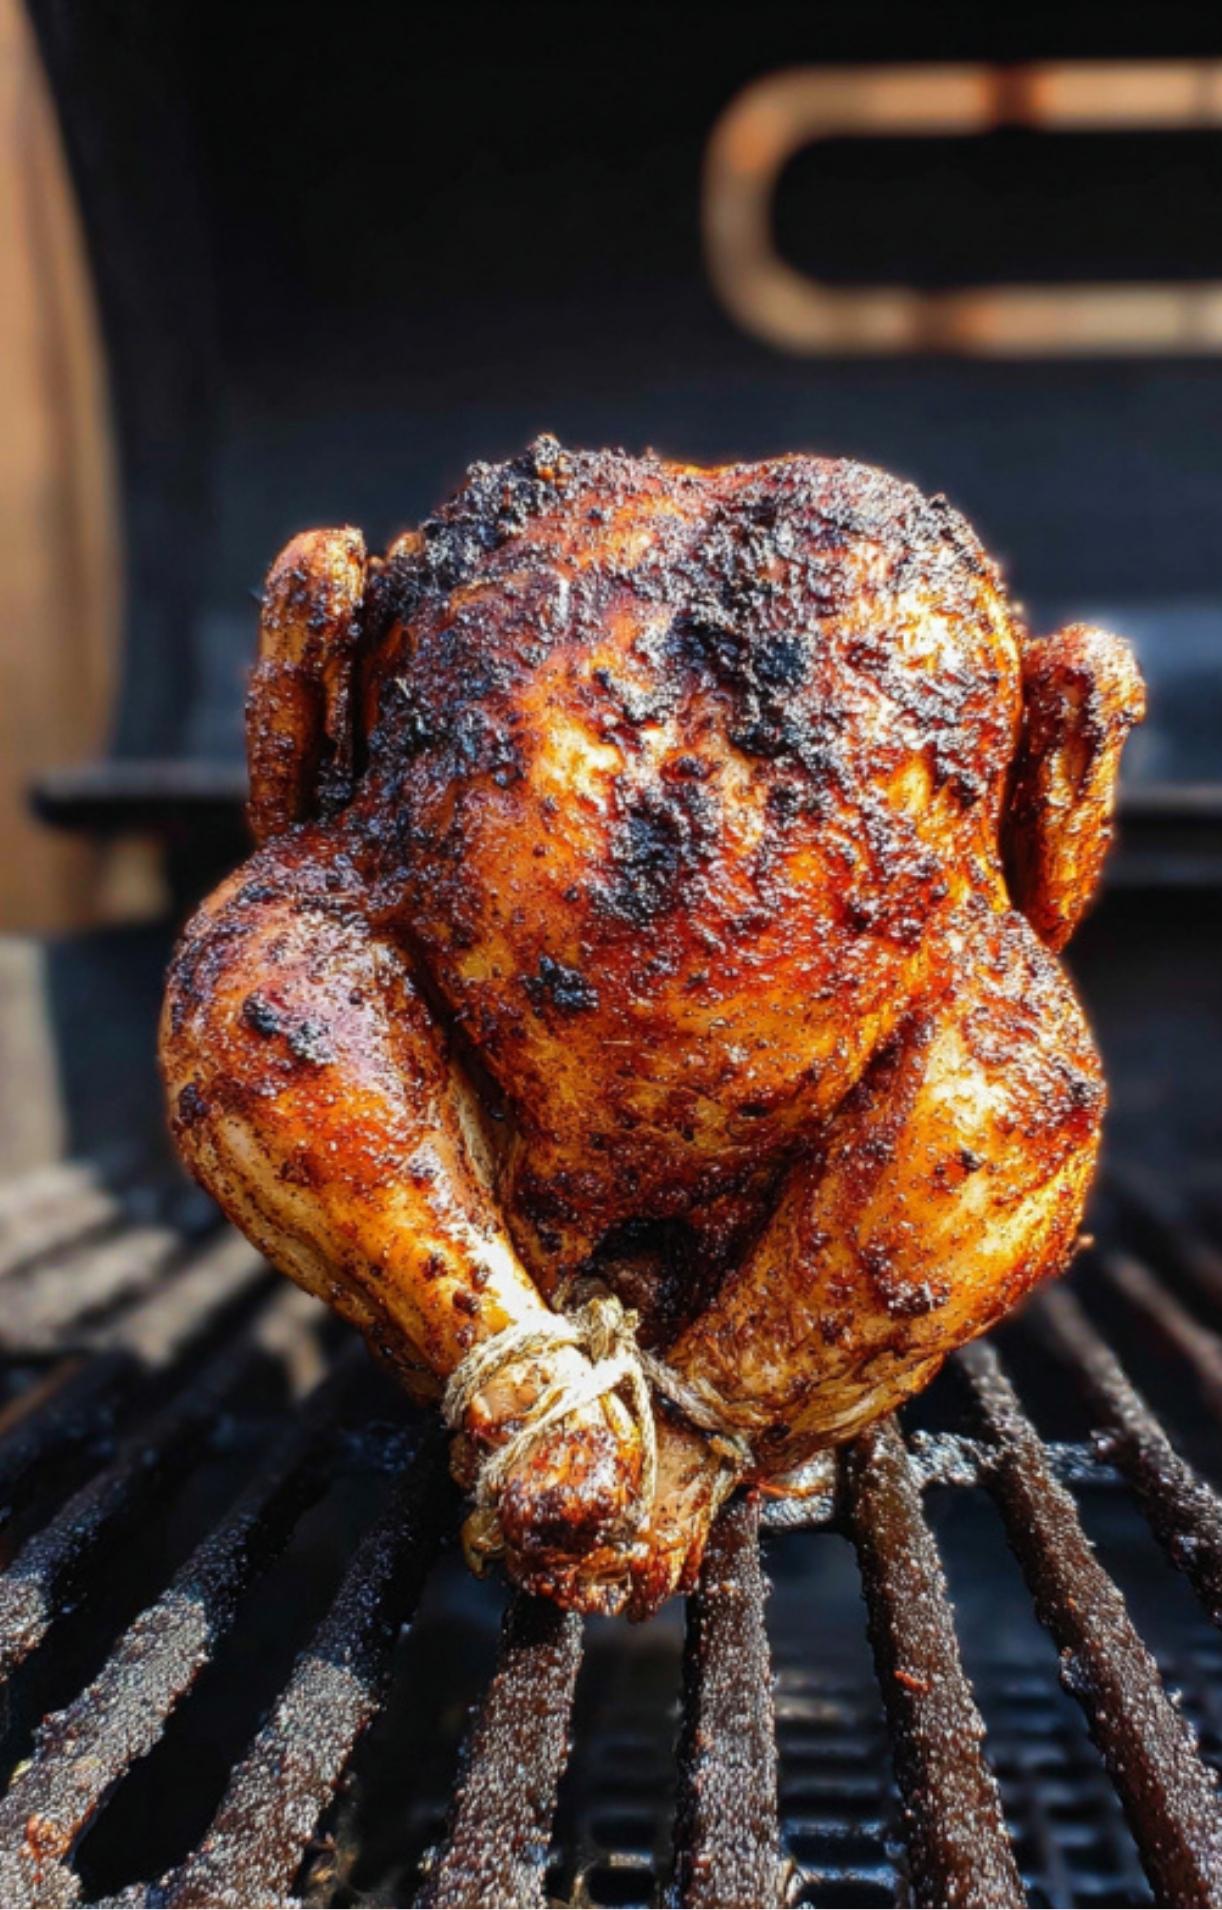
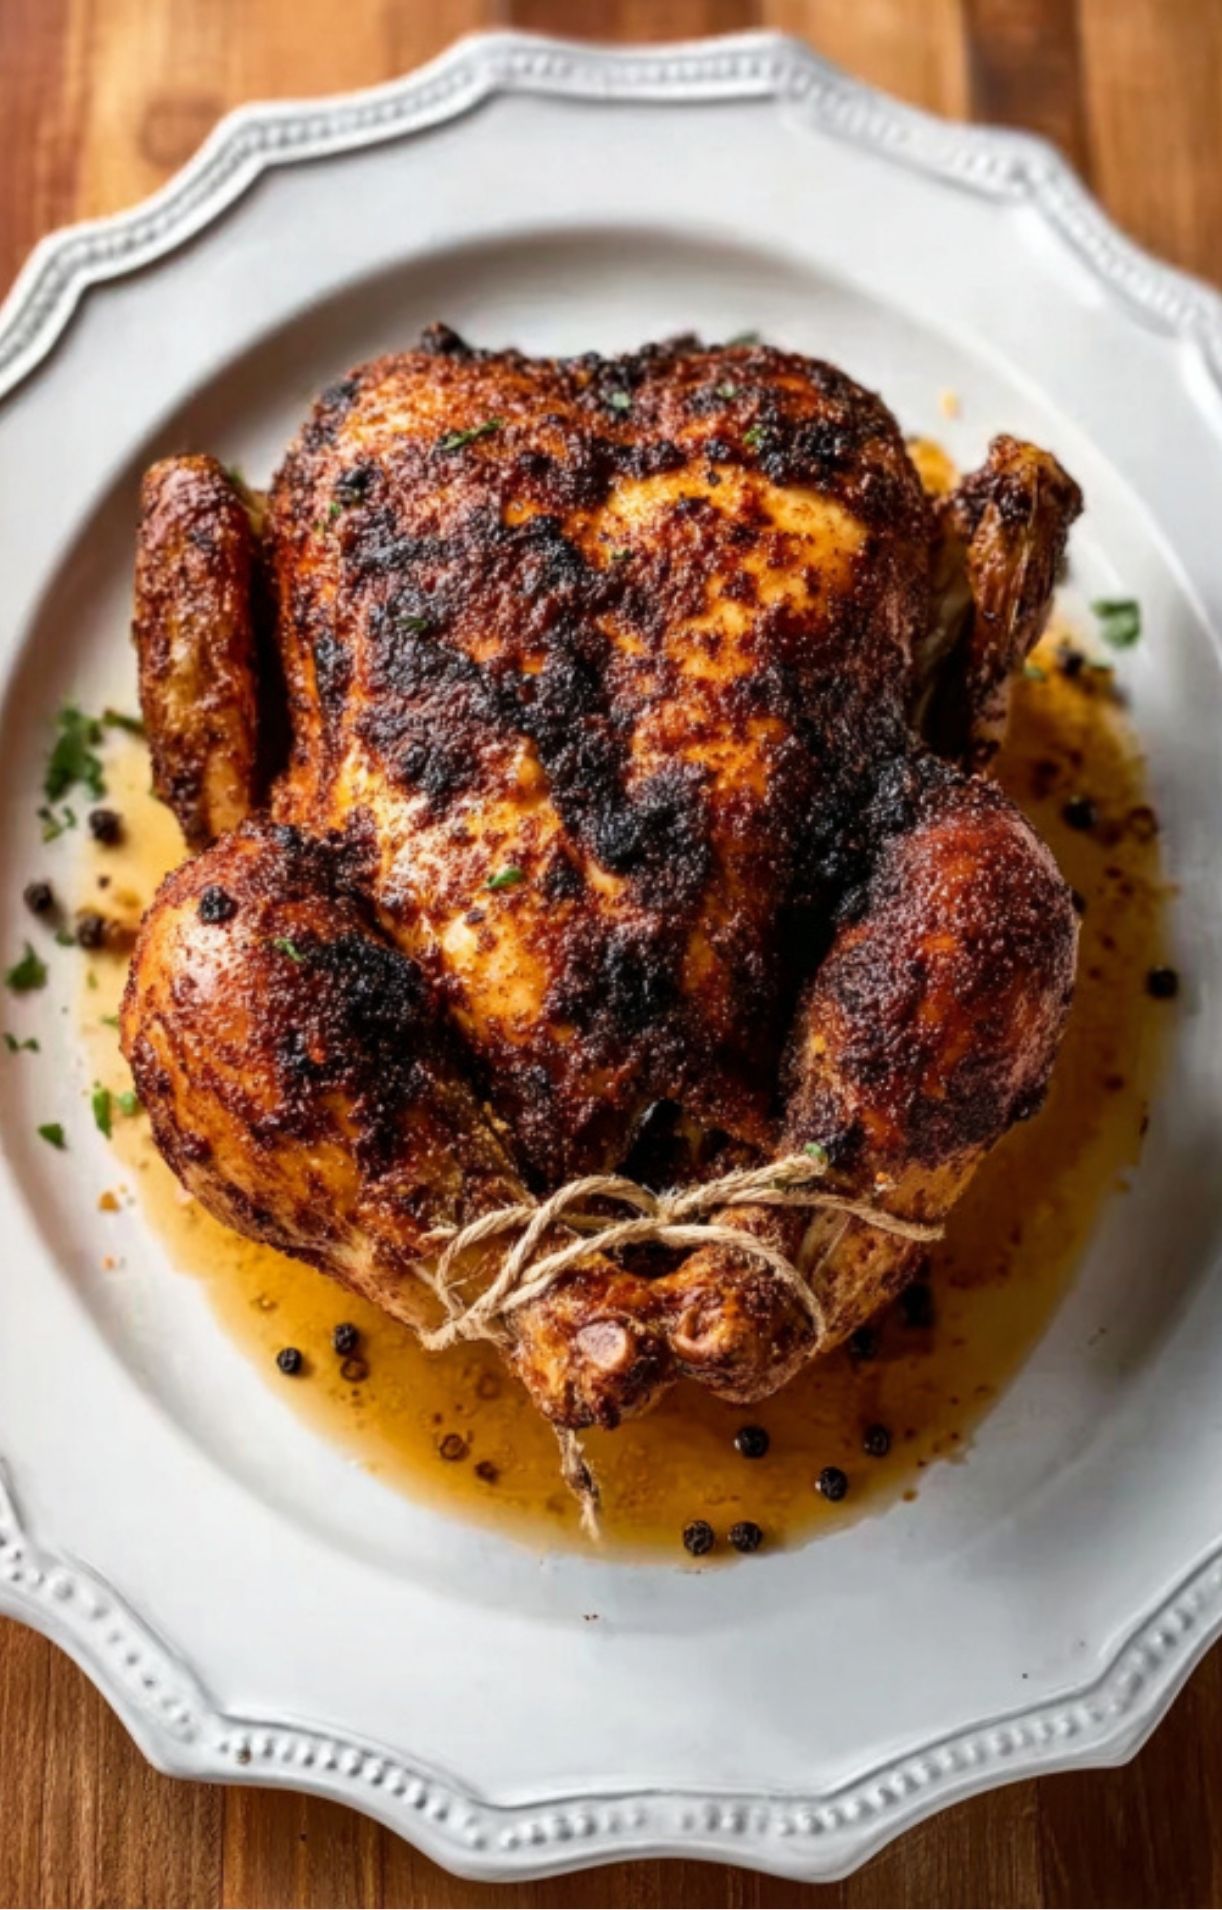
- Remove and rest. Use tongs and heatproof gloves to transfer the bird to a carving board. Slide the chicken toward the edge of the board so the can hangs over a sink. Carefully pull the can free and discard the contents. Let the chicken rest at least 10 minutes before carving. This rest time allows juices to redistribute.
Timing guide
- Prep time: 10 to 20 minutes
- Grill time: 60 to 90 minutes depending on bird size and grill heat
- Rest time: 10 to 15 minutes
- Total time: about 1 hour 30 minutes to 2 hours

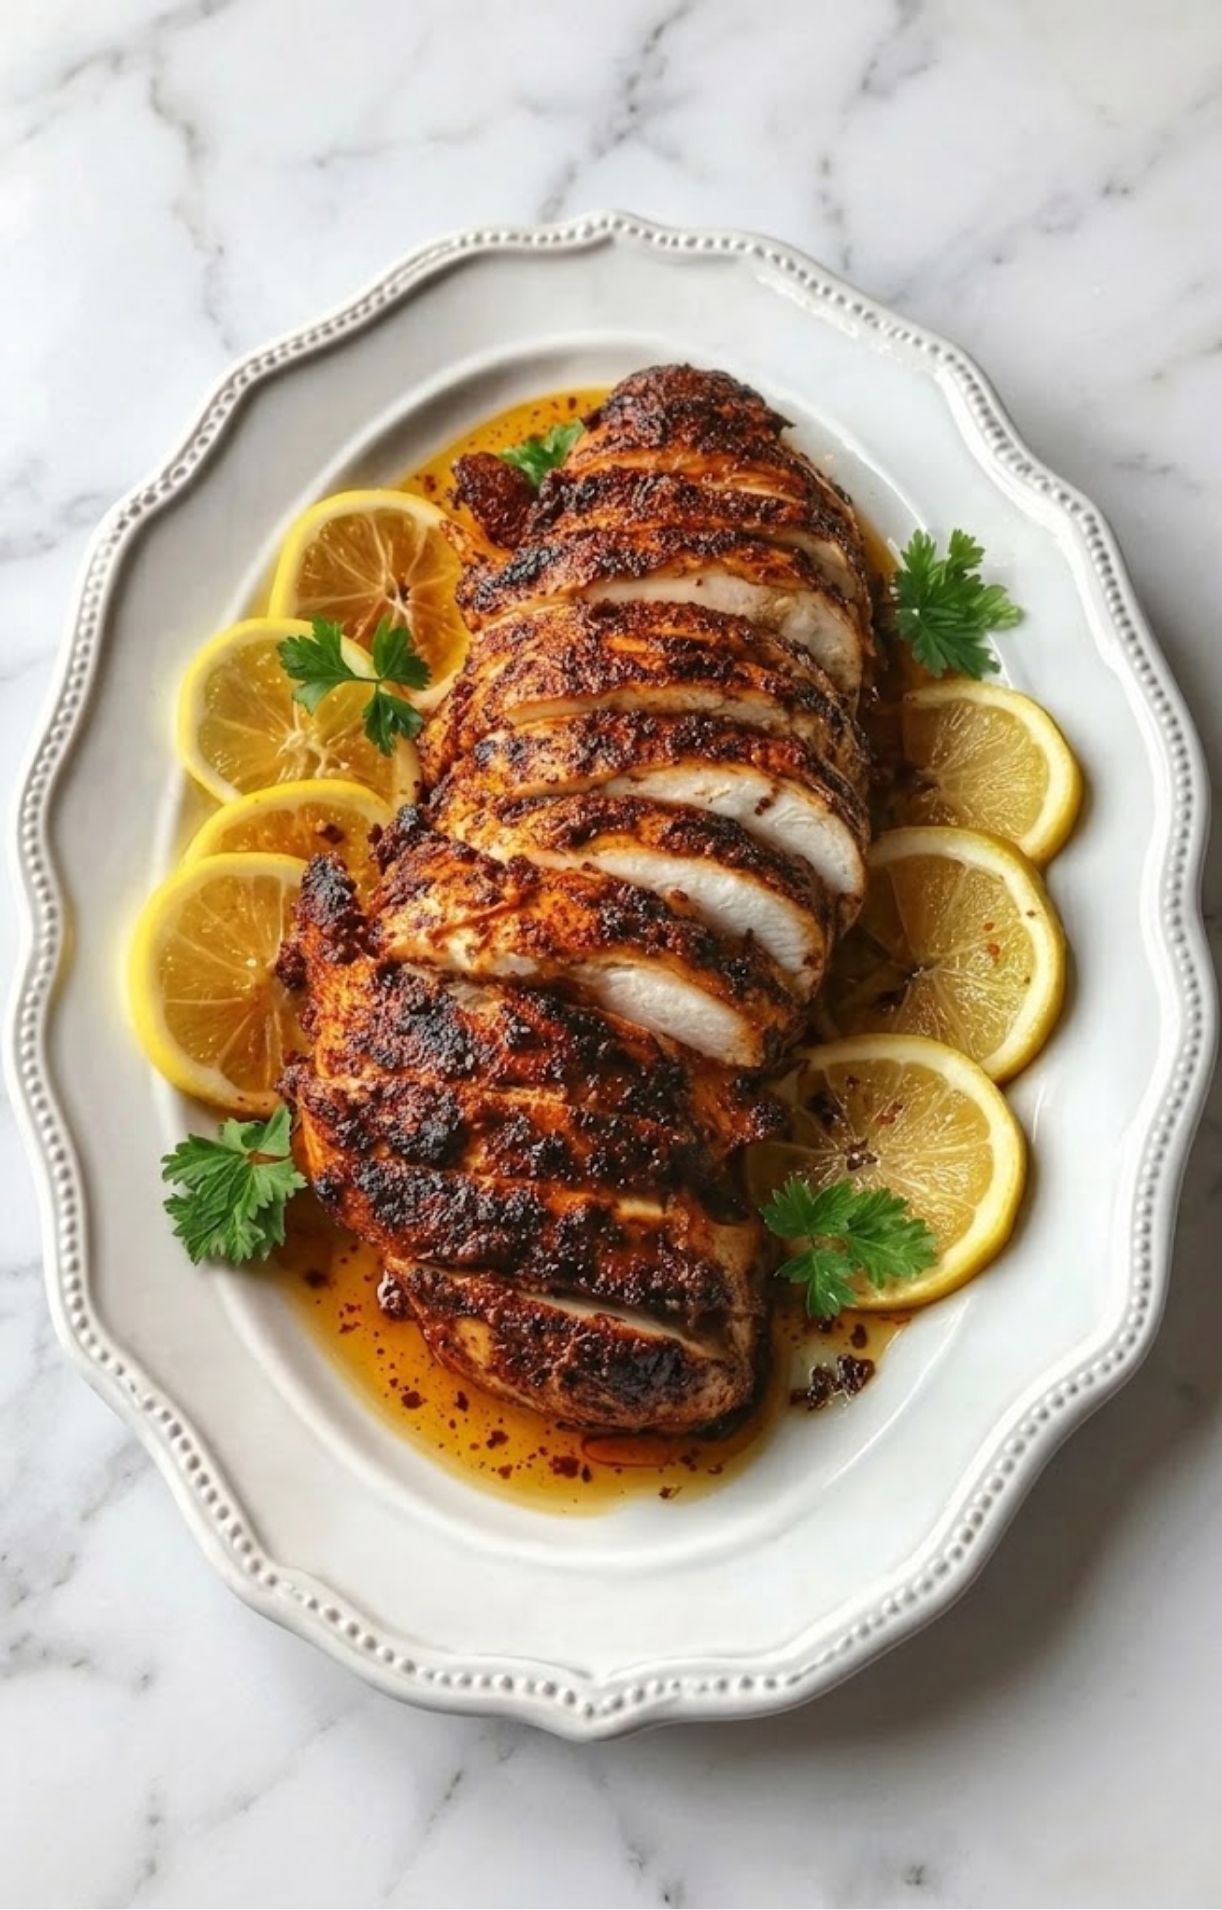
Beer Can Chicken Grill
This beer can chicken grill recipe delivers crispy, bronzed skin and juicy, tender meat with minimal hands-on time. Cooked upright over indirect heat, the steam keeps the chicken moist while the grill creates smoky flavor and crackly skin. A reliable, crowd-pleasing method perfect for weekends and gatherings.
Ingredients
- 1 whole chicken, 3 ½ to 5 lb, giblets removed
- 1 (12 oz) can beer, half emptied; or nonalcoholic beer; or 1 cup low-sodium chicken broth plus 1 tablespoon apple cider vinegar
- 2 tablespoons neutral oil such as canola or avocado
- 1 tablespoon kosher salt
- 1 tablespoon brown sugar
- 2 teaspoons smoked paprika or regular paprika
- 2 teaspoons garlic powder
- 2 teaspoons onion powder
- 1 teaspoon ground black pepper
- 1 teaspoon chili powder or cayenne optional
- Optional aromatics: lemon halves, smashed garlic cloves, thyme or rosemary sprigs
Instructions
- Preheat grill to 350°F to 375°F. For charcoal, bank coals to one side for indirect heat.
- Whisk together brown sugar, kosher salt, smoked paprika, garlic powder, onion powder, black pepper, and chili powder if using.
- Pat chicken dry and rub with neutral oil. Loosen skin and rub some seasoning underneath over breasts and thighs. Rub remaining seasoning all over the outside and inside the cavity. Tie legs and tuck wing tips if desired.
- Open the beer and pour out about half. Place the can in a shallow pan and carefully lower the chicken onto the can so it stands upright. If using broth, fill the can with that mixture instead.
- Place chicken over indirect heat. Maintain grill temperature between 325°F and 350°F with lid closed. Cook 1 hour to 1 hour 20 minutes depending on size.
- Insert an instant-read thermometer into the thickest part of the thigh. Breast should read 165°F and thigh about 175°F. Tent breast with foil if needed while thighs finish.
- For extra crisp skin, move briefly to direct heat for the final 5 to 10 minutes, watching carefully.
- Transfer to a cutting board. Carefully remove and discard the hot can. Rest 10 to 15 minutes before carving and serving.
Notes
Use an instant-read thermometer for accuracy. Maintain steady indirect heat and avoid opening the lid often. If the bird feels unstable, use a vertical poultry roaster or create a foil ring for support. Do not overfill the can and use caution when removing hot liquid. Brine 2 to 4 hours beforehand for extra juiciness if desired.
Nutrition Information
Serving Size 1 servingAmount Per Serving Calories 440Total Fat 26gSaturated Fat 7gTrans Fat 0gUnsaturated Fat 17gCholesterol 155mgSodium 780mgCarbohydrates 6gFiber 0gSugar 4gProtein 47g
Brining for guaranteed juiciness
If you have the time, brine the chicken 2 to 4 hours before grilling. Mix 4 cups water, ¼ cup kosher salt, and ¼ cup brown sugar until dissolved. Cool and submerge the chicken. Refrigerate for 2 to 4 hours. Rinse and pat dry before seasoning to avoid oversalting.
Flavor variations and substitutions
- No beer option: Use nonalcoholic beer or 1 cup chicken broth plus 1 tablespoon apple cider vinegar. The steam matters more than the alcohol.
- Citrus herb: Add lemon halves and a few sprigs of thyme and rosemary to the cavity and in the drip pan for brighter aromatics.
- Smoky and sweet: Add 1 tablespoon brown sugar and use smoked paprika. Finish with a thin glaze of honey and hot sauce in the final 10 minutes for shine.
- Spicy: Add 1 teaspoon cayenne or 1 teaspoon chipotle powder to the rub.
- Low salt: Reduce kosher salt by one third and increase other spices to maintain flavor.
Troubleshooting common grill problems
- Bird wobbles on the can: Use a vertical poultry roaster or make a foil ring under the can for a steadier base. You can also set the can inside a shallow metal bowl to stabilize.
- Skin not crisping: Make sure the bird is dry before seasoning and the grill is hot enough. Increase heat for the final 5 to 10 minutes or move briefly to direct heat, watching closely.
- Thighs undercooked while breast is done: Tent the breast with foil and let the thighs continue to cook until 175°F. Alternatively, rotate the bird so thighs get closer to the heat.
- Flare-ups: Trim excess fat near the cavity, keep a spray bottle of water to control flames, and avoid placing the bird over direct flames for the majority of cooking.
Troubleshooting when you are away from the grill
If you need to step away temporarily, the bird will tolerate short breaks in cooking if the lid stays closed. Avoid opening the lid often because every peek drops temperature and adds time. If you lose heat, bring the grill back to target temperature as soon as you return and continue cooking. The thermometer will tell you when it is done.
Storage and reheating
- Refrigerate leftovers in airtight containers within two hours of cooking. Use within 3 to 4 days.
- Reheat gently in a 325°F oven covered with foil and a splash of chicken stock to preserve moisture. For pieces, 15 to 20 minutes is usually enough.
- Freeze shredded chicken in portioned bags for up to 3 months.
Serving ideas and side pairings
Beer can chicken grill works beautifully with easy, hands-off sides so you can enjoy the company:
- Charred corn on the cob with butter and chopped herbs
- Grilled potatoes or a batch of foil-wrapped baby potatoes tossed in herb butter
- A bright, crunchy slaw with apple and cabbage for contrast
- Grilled romaine with lemon vinaigrette
- Warm dinner rolls or cornbread for soaking up juices
Leftovers are fantastic shredded for tacos, tossed into salads, or folded into creamy chicken pasta.

Final notes on safety and etiquette
Never leave the grill unattended for long stretches. Keep pets and children well away from the cooking area. Use heavy-duty gloves and tools when handling the hot bird and the can. If you have any uncertainty about heating a metal can, use a vertical poultry roaster as a one-time purchase that is safer and more stable.
FAQ
Yes. Any heat-safe, narrow vessel that can hold liquid and prop the bird upright will work. Nonalcoholic beer, soda, or chicken broth are fine substitutes. For safety and stability, a purpose-built vertical poultry roaster is recommended.
An instant-read thermometer is your best friend. Insert it into the thickest part of the thigh without touching bone. The breast should read 165°F and the thigh about 175°F. Rest the bird for 10 minutes before carving so juices redistribute.
Most home cooks have no issue using a can, especially if you do not heat it to extreme temperatures. If you are uncomfortable with a can, use nonalcoholic beer, broth, or a dedicated roaster. Always pour out some of the liquid to leave headspace and avoid splashes.
Yes, if your grill has the space. Place each bird on its own roasting stand or tall can, and make sure they have enough room for air to circulate. Rotate positions halfway through cooking if your grill has hot and cooler spots.
Leave a Reply