
Hey, I’m Chloe! If there’s one thing I absolutely love about comfort cooking, it’s the way certain recipes feel like they’ve been passed through generations — the kind you can picture someone’s dad making year after year after Thanksgiving. That’s exactly the spirit behind this Dad’s Turkey Pot Pie.
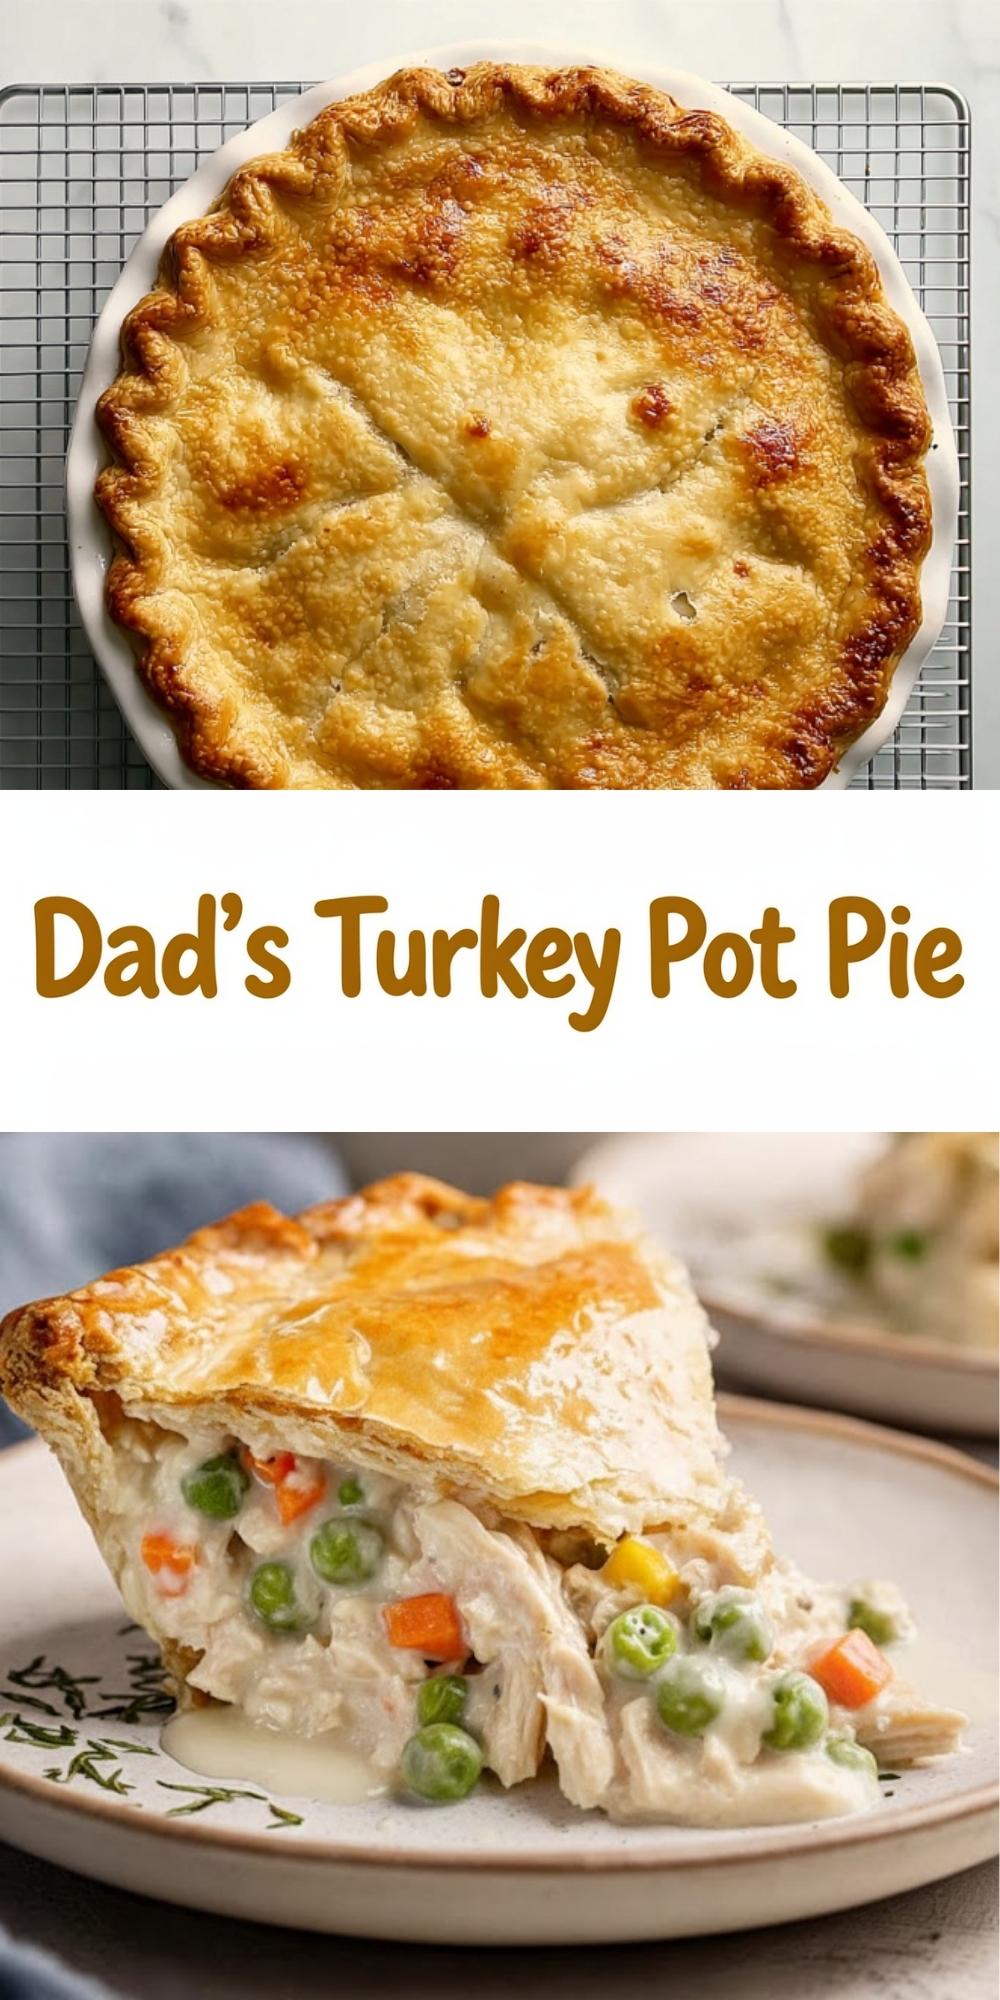
This version keeps all the nostalgic charm of a classic pot pie but brings it into the Meat & Melt kitchen with a warm, approachable twist. It’s creamy, hearty, loaded with leftover turkey, and wrapped in flaky pie crust on both the top and bottom. And since it makes two full pies, you get double the cozy payoff with the same amount of effort — which, in my book, is always a huge win.
Why You’ll Love This Dad’s Turkey Pot Pie


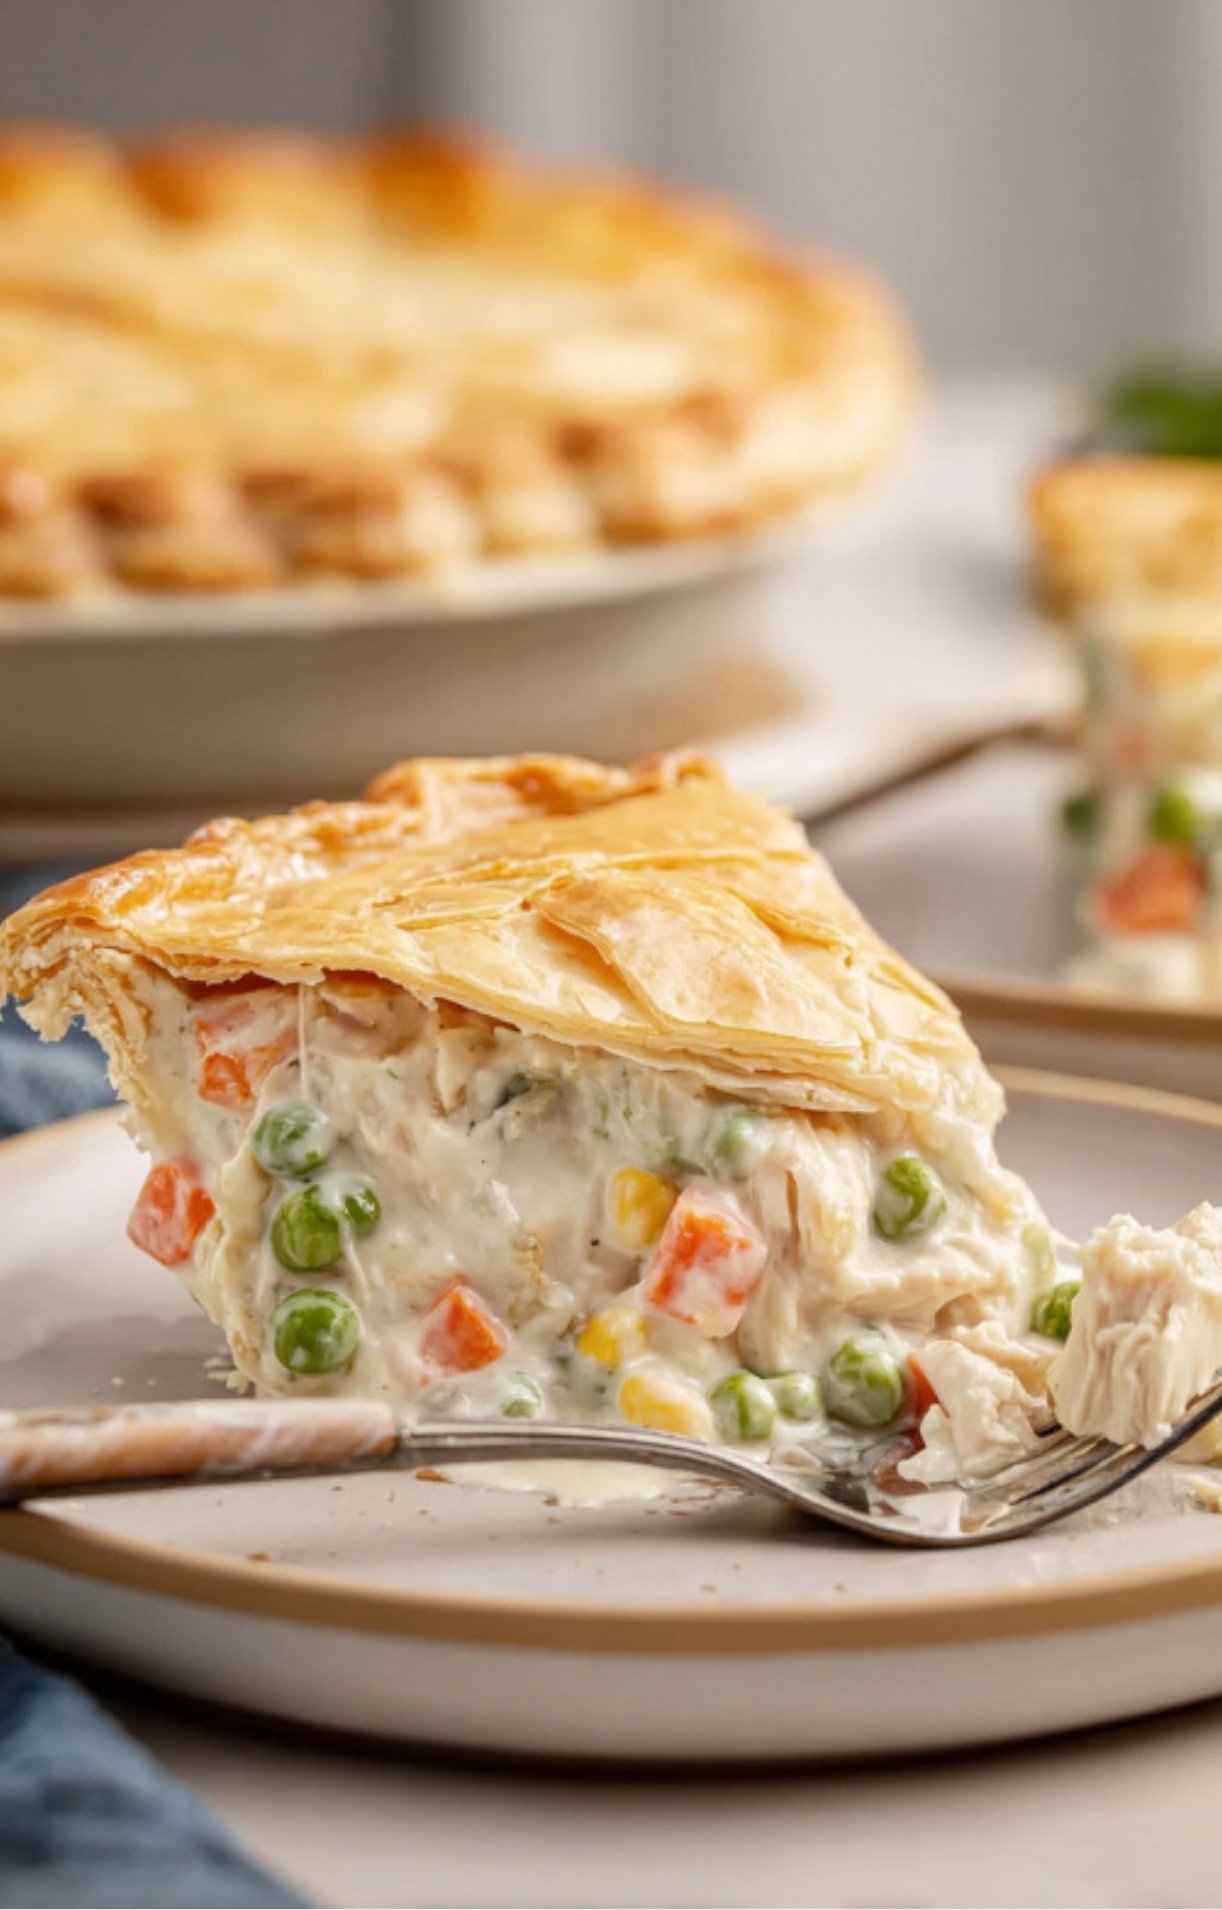
This nostalgic turkey pot pie is the ultimate cold-weather comfort, turning leftovers into a simple, heart-warming meal that would make any dad proud. The recipe yields two 9-inch pies—one to enjoy now and one to freeze for later—using a stovetop filling and ready-made crusts for maximum ease. With its creamy interior and golden, crisp finish, this dish delivers a perfect blend of textures that feels like a warm hug in every slice.
Ingredients You Need for Dad’s Turkey Pot Pie
Everything here is familiar, cozy, and easy to work with — exactly how comfort cooking should feel.
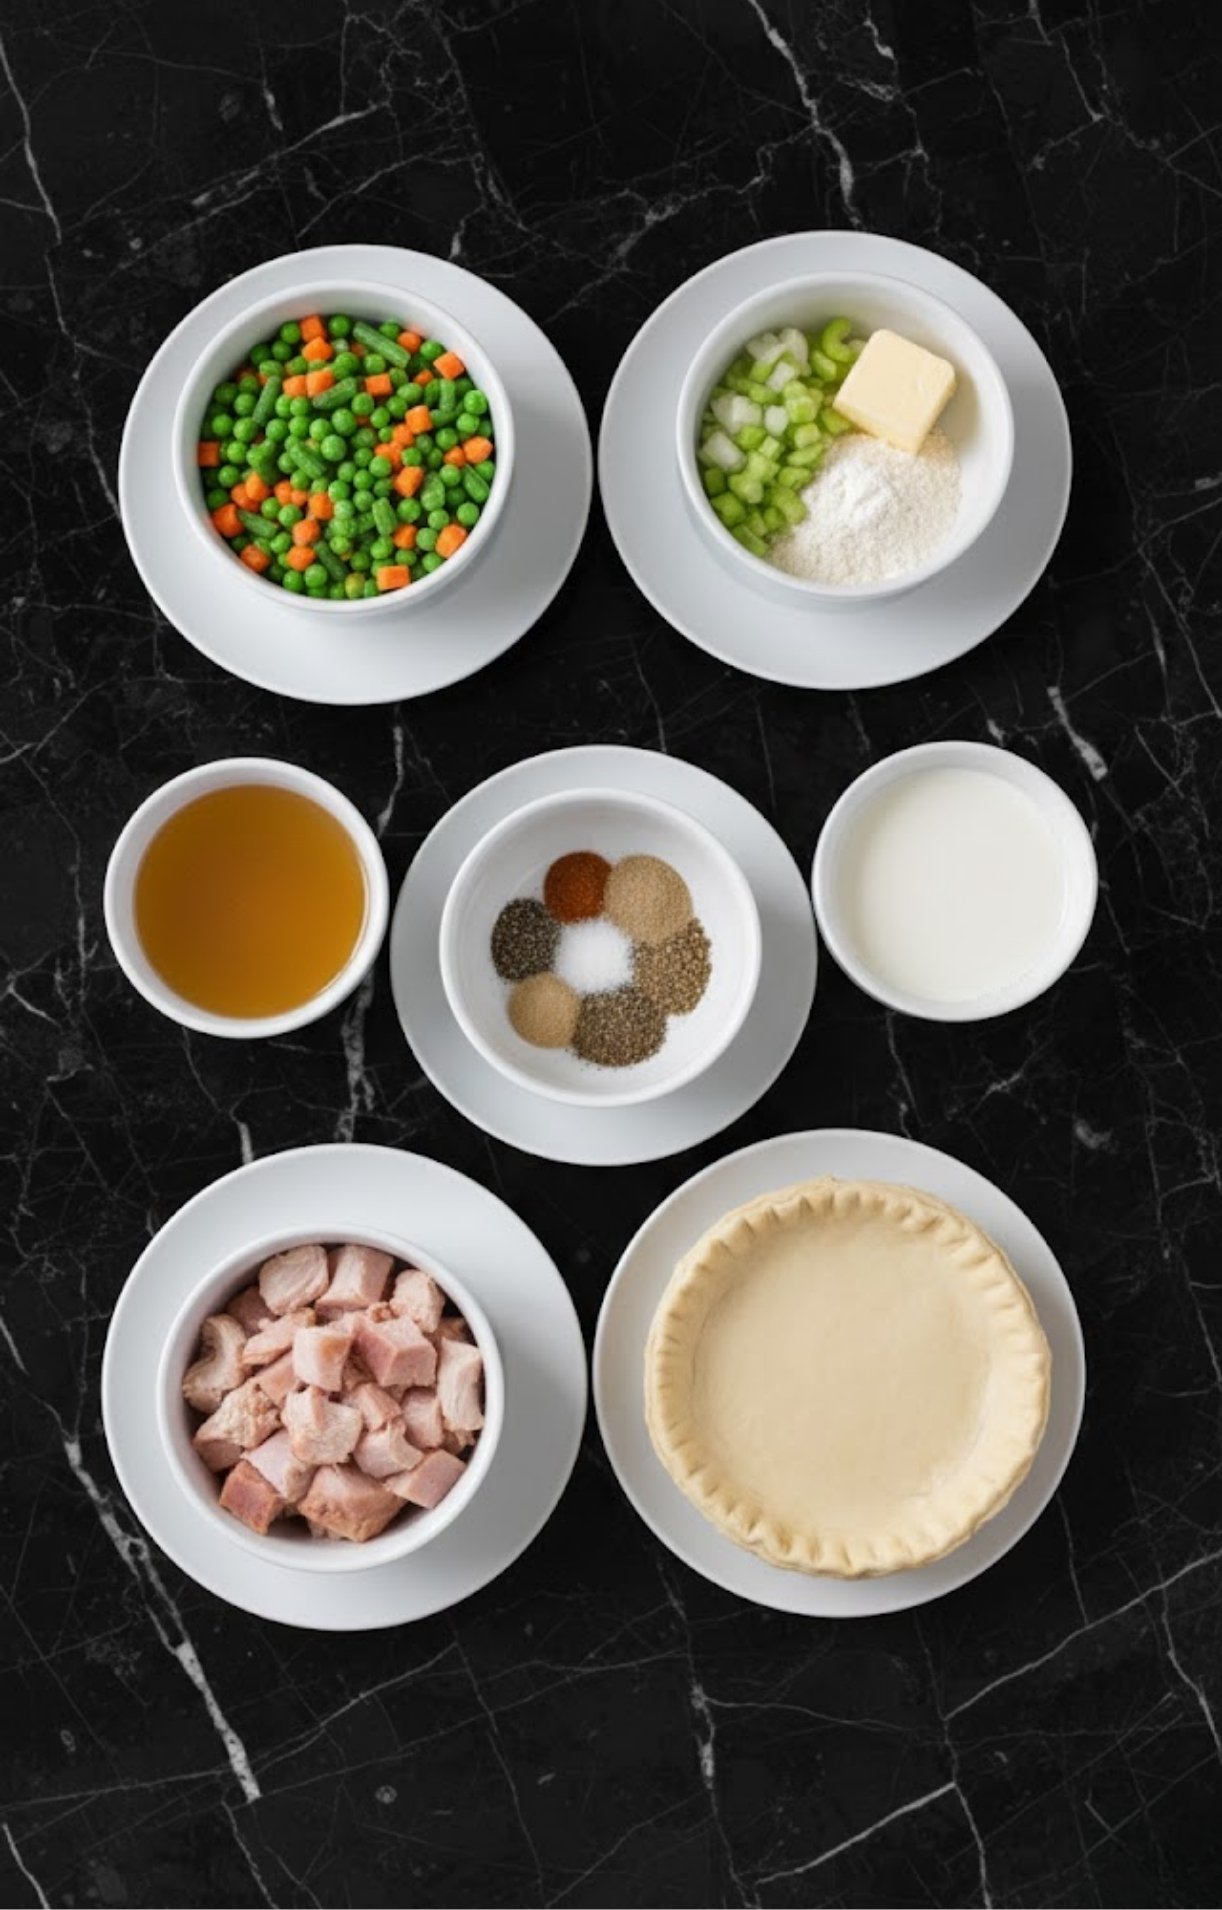
- Frozen Vegetables: Peas, carrots, green beans — the classics. You can swap in corn, mushrooms, or whatever you like.
- Fresh Vegetables: Celery and onion add sweetness and depth.
- Butter and Flour: The foundation of a simple, silky roux.
- Seasonings: Salt, pepper, celery seed, onion powder, and Italian seasoning keep the flavor warm and homey.
- Chicken or Turkey Broth: For a sauce that carries all the savory goodness.
- Milk: Creates that creamy, comforting filling your pot pie needs.
- Leftover Turkey: Cubed or shredded — whatever you’ve got works beautifully.
- Pie Crust: Store-bought double crusts keep the process quick, but homemade works if you’re feeling fancy.
For precise amounts, check the recipe card at the end of the post.
How to Make Dad’s Turkey Pot Pie
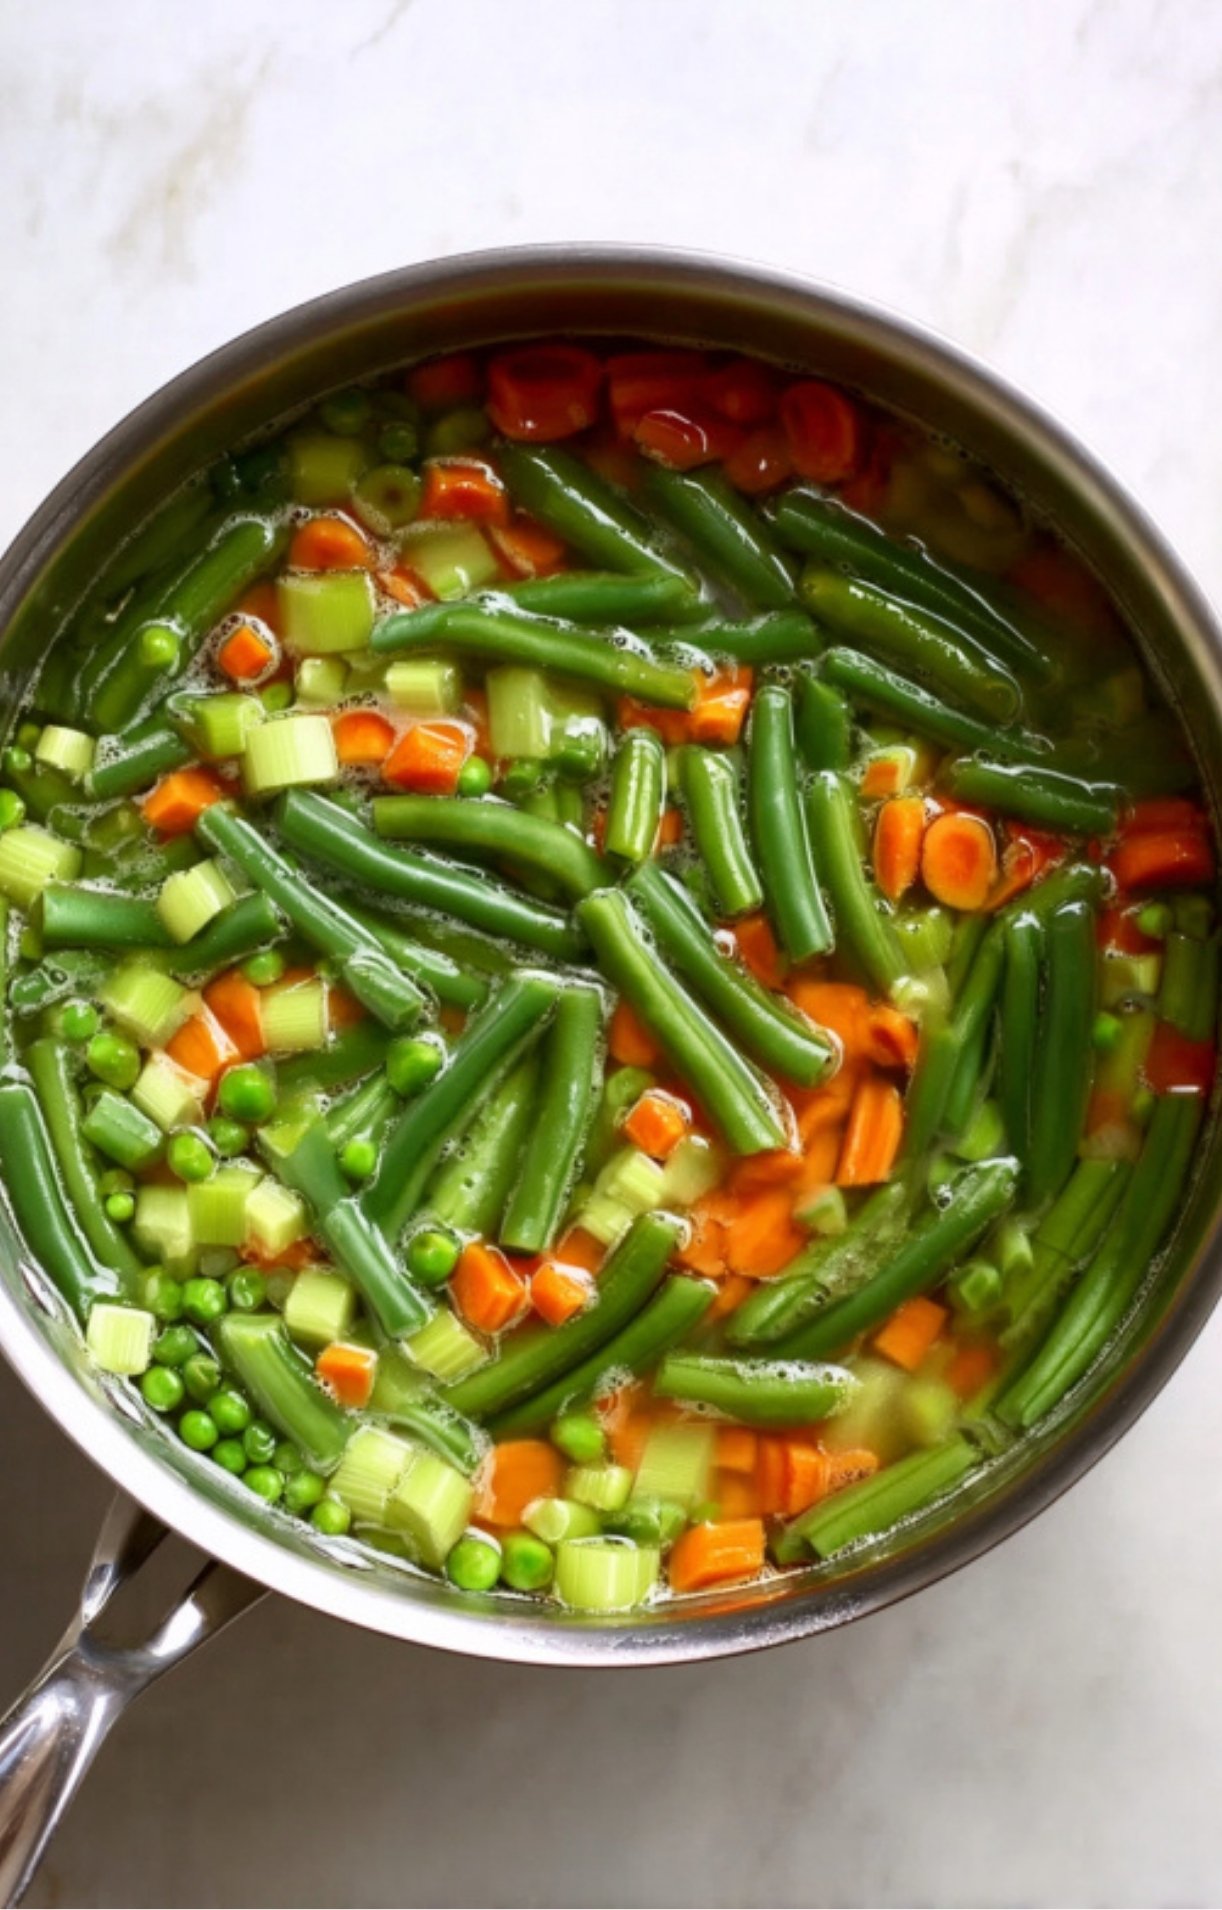
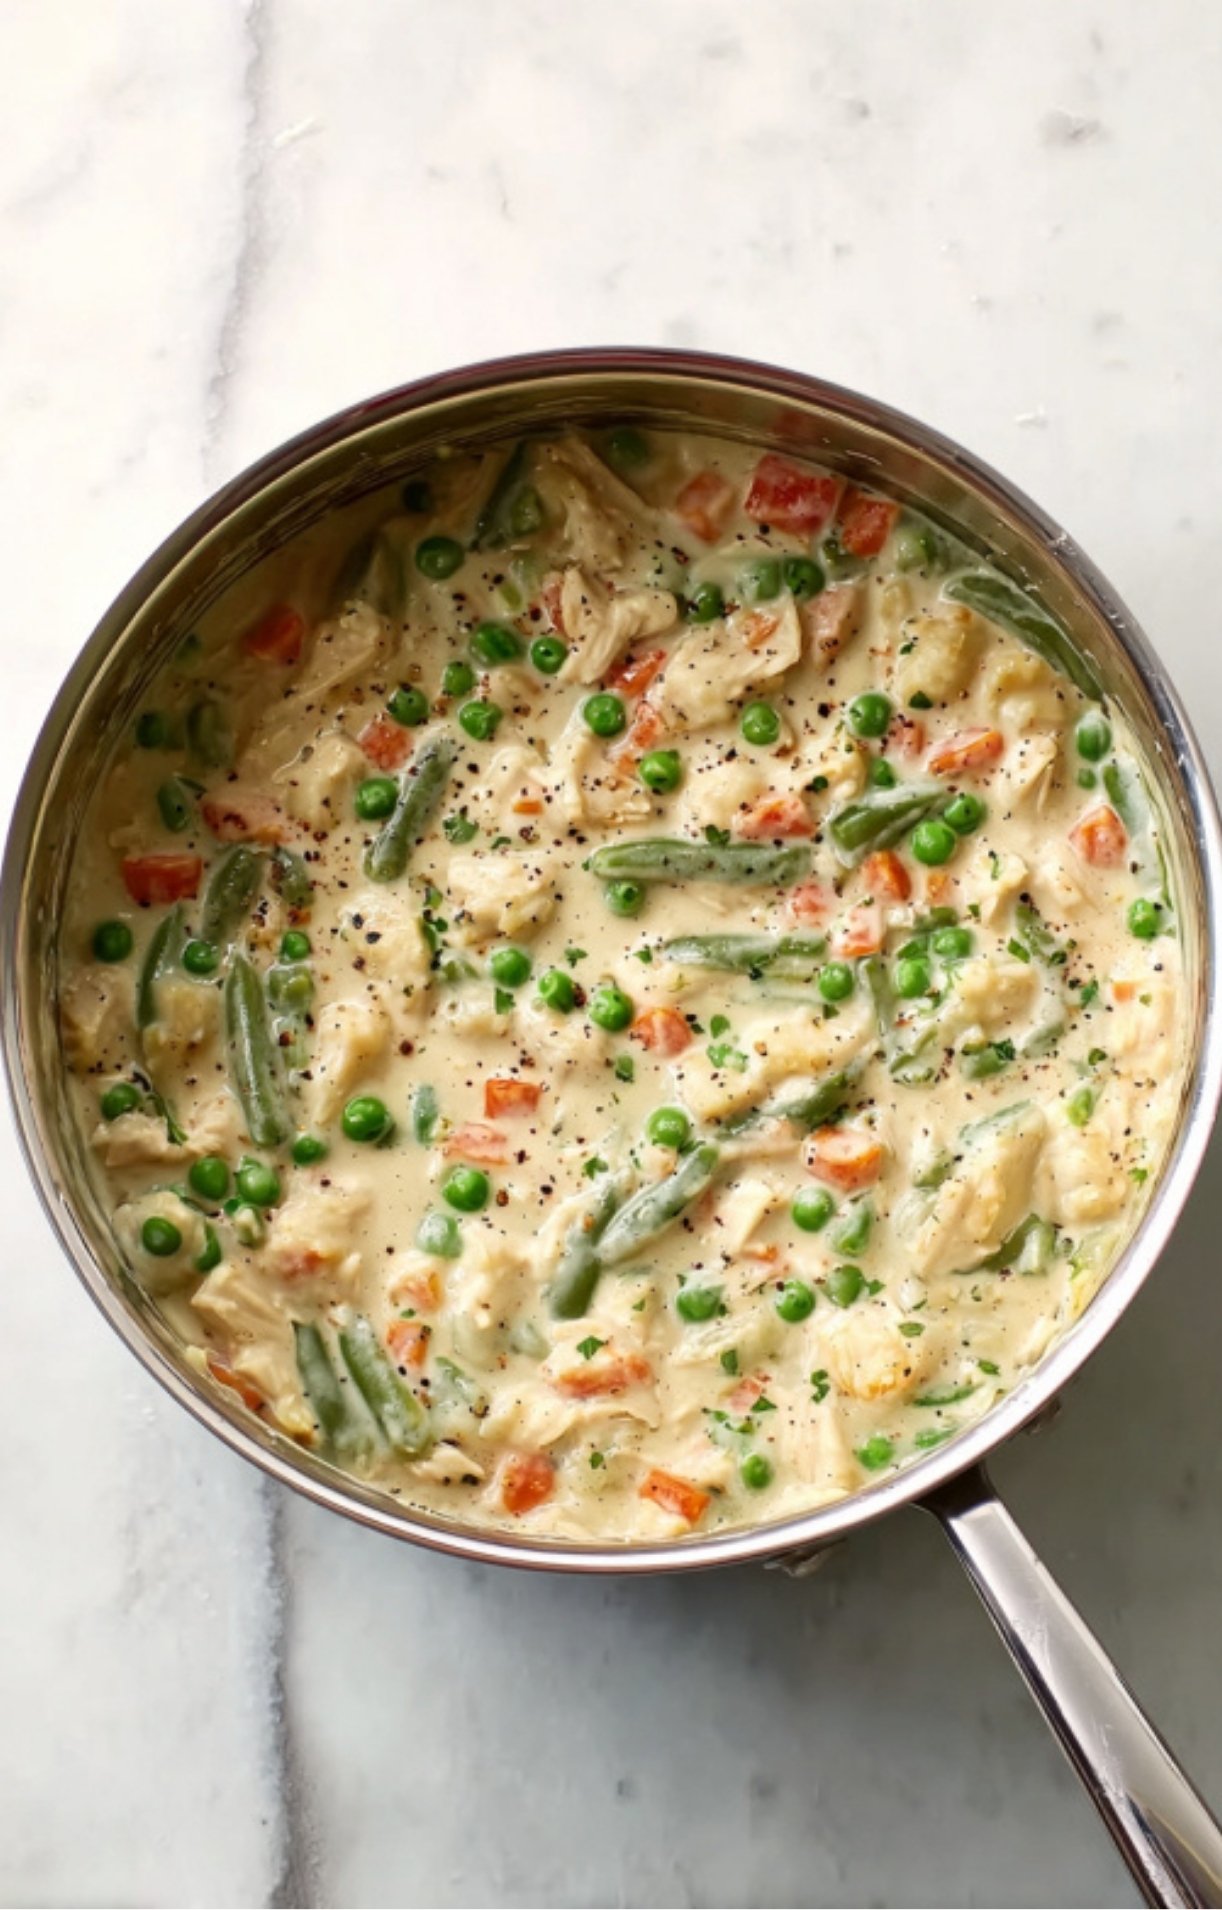
Cook the Vegetables
Simmer frozen veggies and celery until tender, then drain.
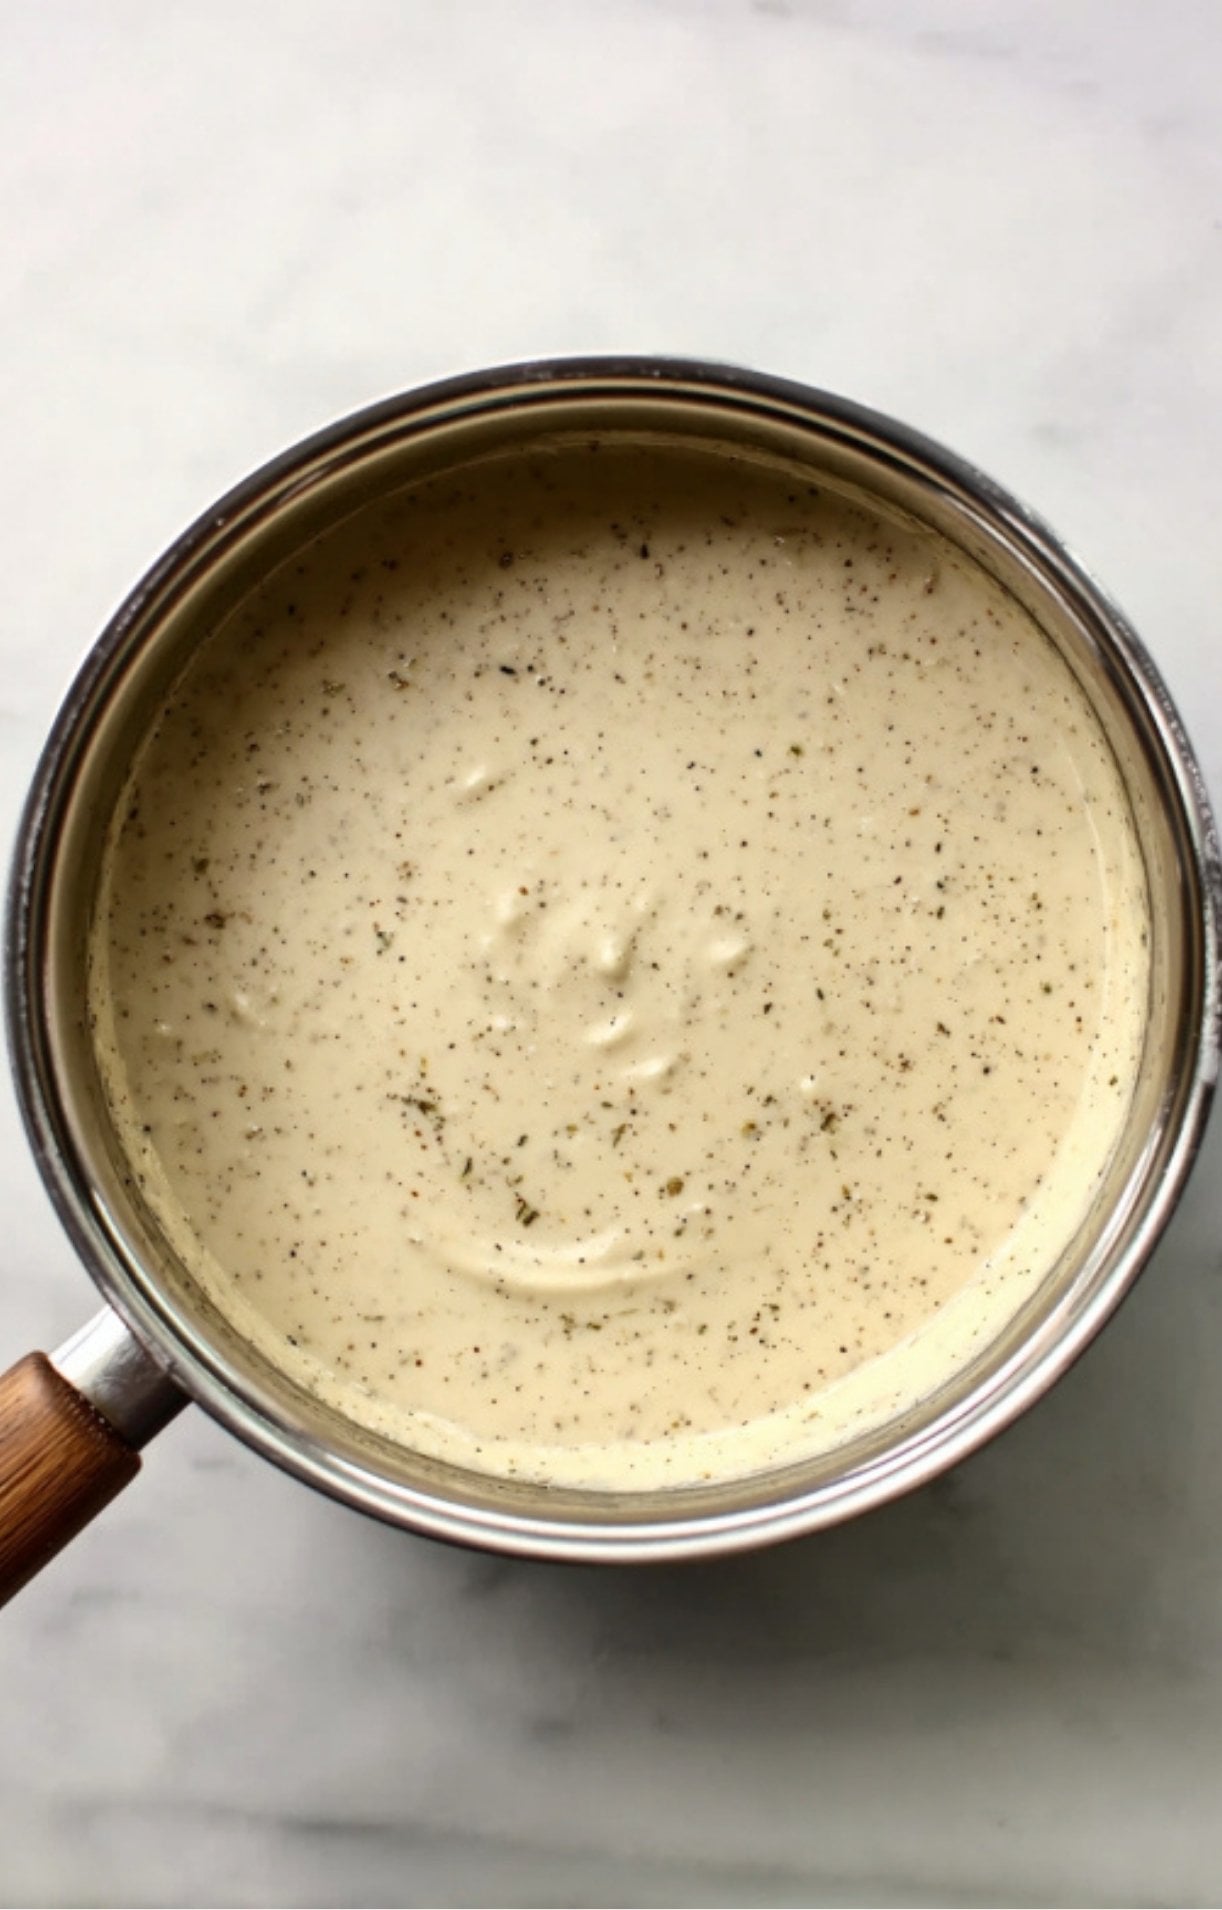
Build the Cream Sauce
Sauté onion in butter, stir in flour and seasonings to form a roux, then whisk in broth and milk until smooth and thickened.
Combine Filling
Fold in the cooked veggies and turkey until everything is well coated.
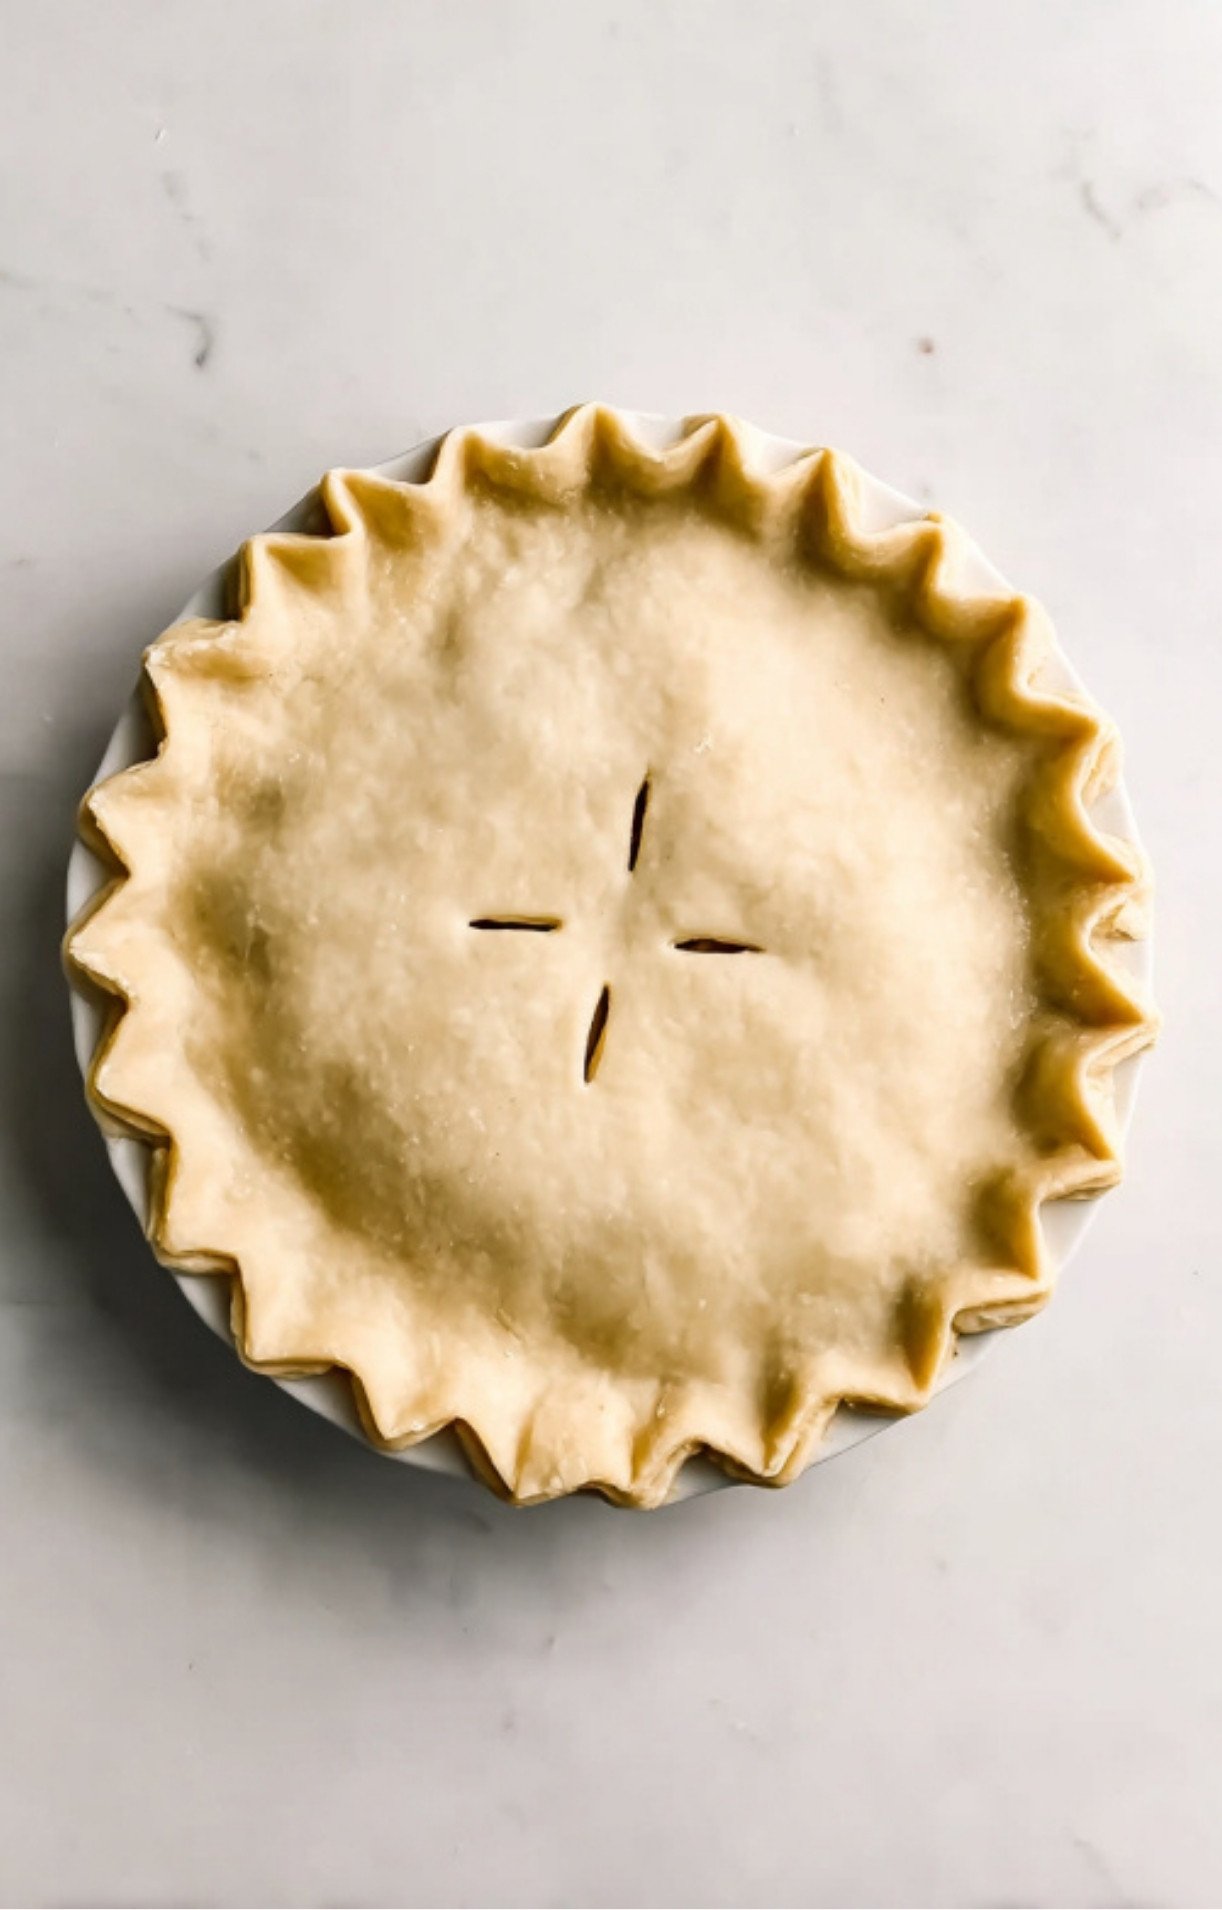
Assemble the Pies
Line pie plates with crusts, divide filling between them, and top with the second crust. Seal and vent.
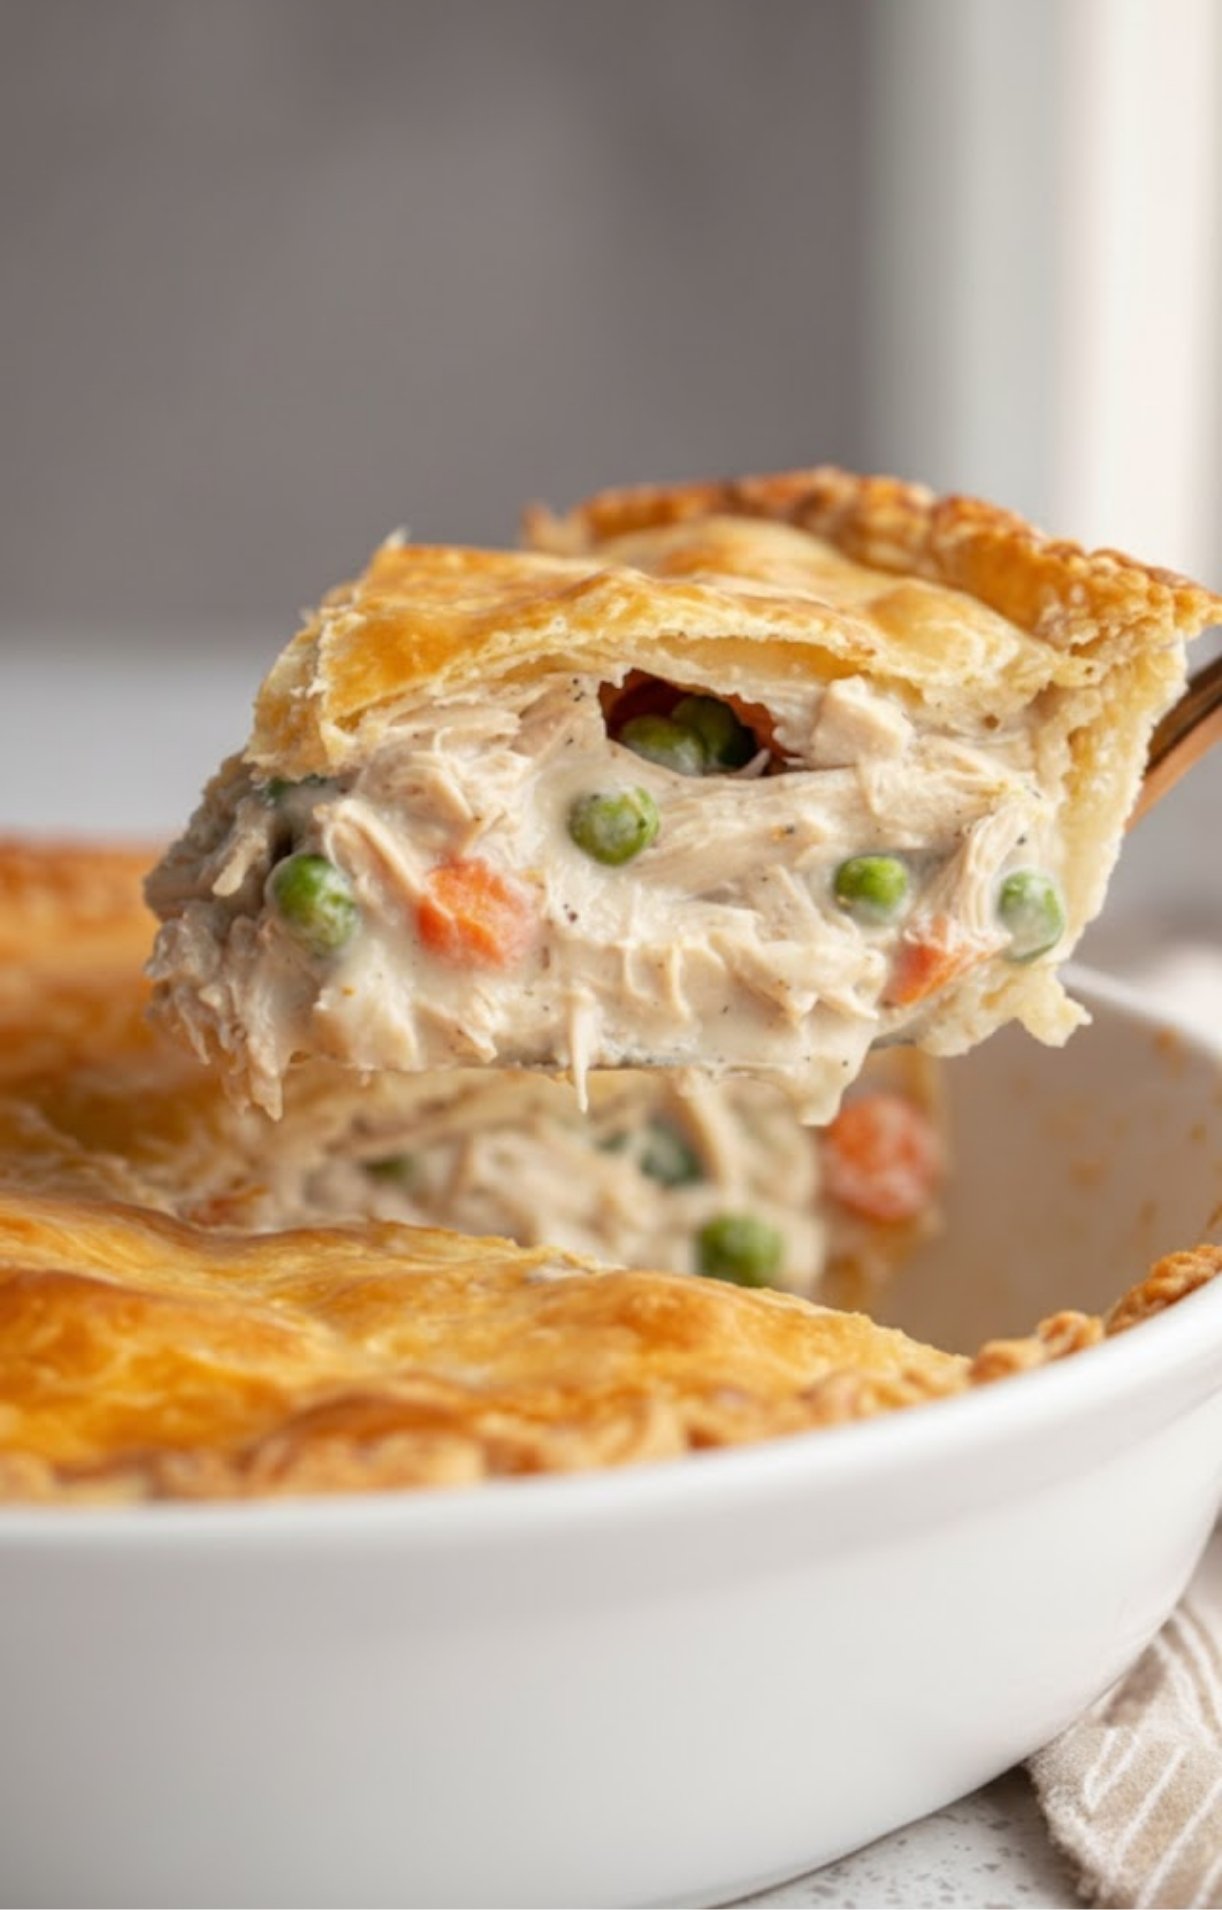
Bake Until Golden
Bake hot and fast until the crust is crisp, bubbly, and deeply golden brown.

Cool and Serve
Let the pies rest for at least 10 minutes so the filling sets — then serve warm and enjoy pure, old-school comfort.
Tips for Making the Best Dad’s Turkey Pot Pie
Make It Creamier
If your filling feels too thick, add a splash more broth or milk until it’s just right.
Freeze One for Later
Assemble both pies and freeze one unbaked. When you’re ready, bake straight from frozen — dinner with zero effort.
Customize the Veggies
Corn, potatoes, mushrooms, or leftover roasted vegetables all work.
Add Extra Flavor
A pinch of paprika or dried sage adds warmth. Fresh herbs are great, too.
Prevent Over-Browning
If the crust browns too quickly, cover the edges with foil.
Serving Ideas
Serve your pot pie with something light and simple to balance the richness:
• A green salad
• Cranberry sauce leftovers
• Steamed broccoli
• Warm dinner rolls
It’s one of those meals that brings everyone to the table without you having to fuss much at all.
Wrapping It Up
Dad’s Turkey Pot Pie is the kind of recipe that reminds you exactly why comfort food matters. It’s nostalgic, cozy, and ridiculously satisfying — the kind of dish that turns leftover turkey into something unforgettable. Whether you bake both pies at once for a crowd or freeze one for a cold night later on, this recipe brings all the home-style comfort you want without a complicated process.
If you try it, I’d love to hear how it turned out — your kitchen stories are my favorite part of Meat & Melt.
FAQ
Yes! Freeze unbaked for up to four months.
Absolutely — it works beautifully with leftover chicken.
Simmering too long will tighten it. Loosen with extra milk or broth.
Yes — a 13×9 baking dish works well.
Top BBQ & Kitchen Picks
Tested, loved and recommended by our team ✨


Dad’s Turkey Pot Pie
A classic double crust turkey pot pie loaded with leftover turkey creamy sauce and mixed vegetables. Makes two pies perfect for freezing or feeding a crowd.
Ingredients
- 2 cups frozen peas and carrots
- 2 cups frozen green beans
- 1 cup sliced celery
- ⅔ cup butter
- ⅔ cup diced onion
- ⅔ cup all purpose flour
- 1 teaspoon salt
- 1 teaspoon black pepper
- ½ teaspoon celery seed
- ½ teaspoon onion powder
- ½ teaspoon Italian seasoning
- 1 ¾ cups chicken broth
- 1 ⅓ cups milk
- 4 cups cubed leftover cooked turkey
- 2 packages double crust pie pastry for two 9 inch pies
Instructions
- Preheat oven to 425°F.
- Boil peas carrots green beans and celery until tender about 8 minutes then drain.
- In a large saucepan melt butter and sauté onions until translucent.
- Stir in flour salt pepper celery seed onion powder and Italian seasoning to form a paste.
- Slowly whisk in broth and milk and simmer until thickened 3 to 5 minutes.
- Remove from heat and fold in vegetables and turkey.
- Fit bottom crusts into two 9 inch pie plates.
- Divide filling between crusts top with remaining crusts and seal edges.
- Cut slits for steam.
- Bake 15 minutes and cover edges with foil if browning too quickly.
- Continue baking 15 to 20 minutes until golden and bubbling.
- Cool 10 minutes before serving.
Notes
Store 3 to 4 days in the refrigerator. Freeze up to four months baked or unbaked. Reheat at 350°F until warmed through. Add a splash of milk or broth if reheating and the filling seems too thick.
Nutrition Information
Serving Size 1 sliceAmount Per Serving Calories 510Total Fat 30gSaturated Fat 14gTrans Fat 0gUnsaturated Fat 13gCholesterol 95mgSodium 840mgCarbohydrates 38gFiber 3gSugar 5gProtein 22g
Leave a Reply